Agent Overview #
Overview #
INFINI Agent is a submodule of INFINI Console, charge of data scraping and Elasticsearch instance manage. it’s manage by INFINI Console. INFINI Agent supports mainstream operating systems and platforms. The program package is small, with no extra external dependency. So, the agent can be installed very rapidly.
Highlights of Agent:
- Collect cluster health/cluster stats/node stats/index stats from Elasticsearch
- Collect local JSON and text logs from Elasticsearch.
- Collect host metrics.
- Upload all metrics and logs to Elasticsearch.
Quick Installation #
Go to the menu INVENTORY > AGENTS and click the Install Agent button. You will see that the Console automatically generates an installation script. Simply click the copy icon in the top right corner of the script to copy it.
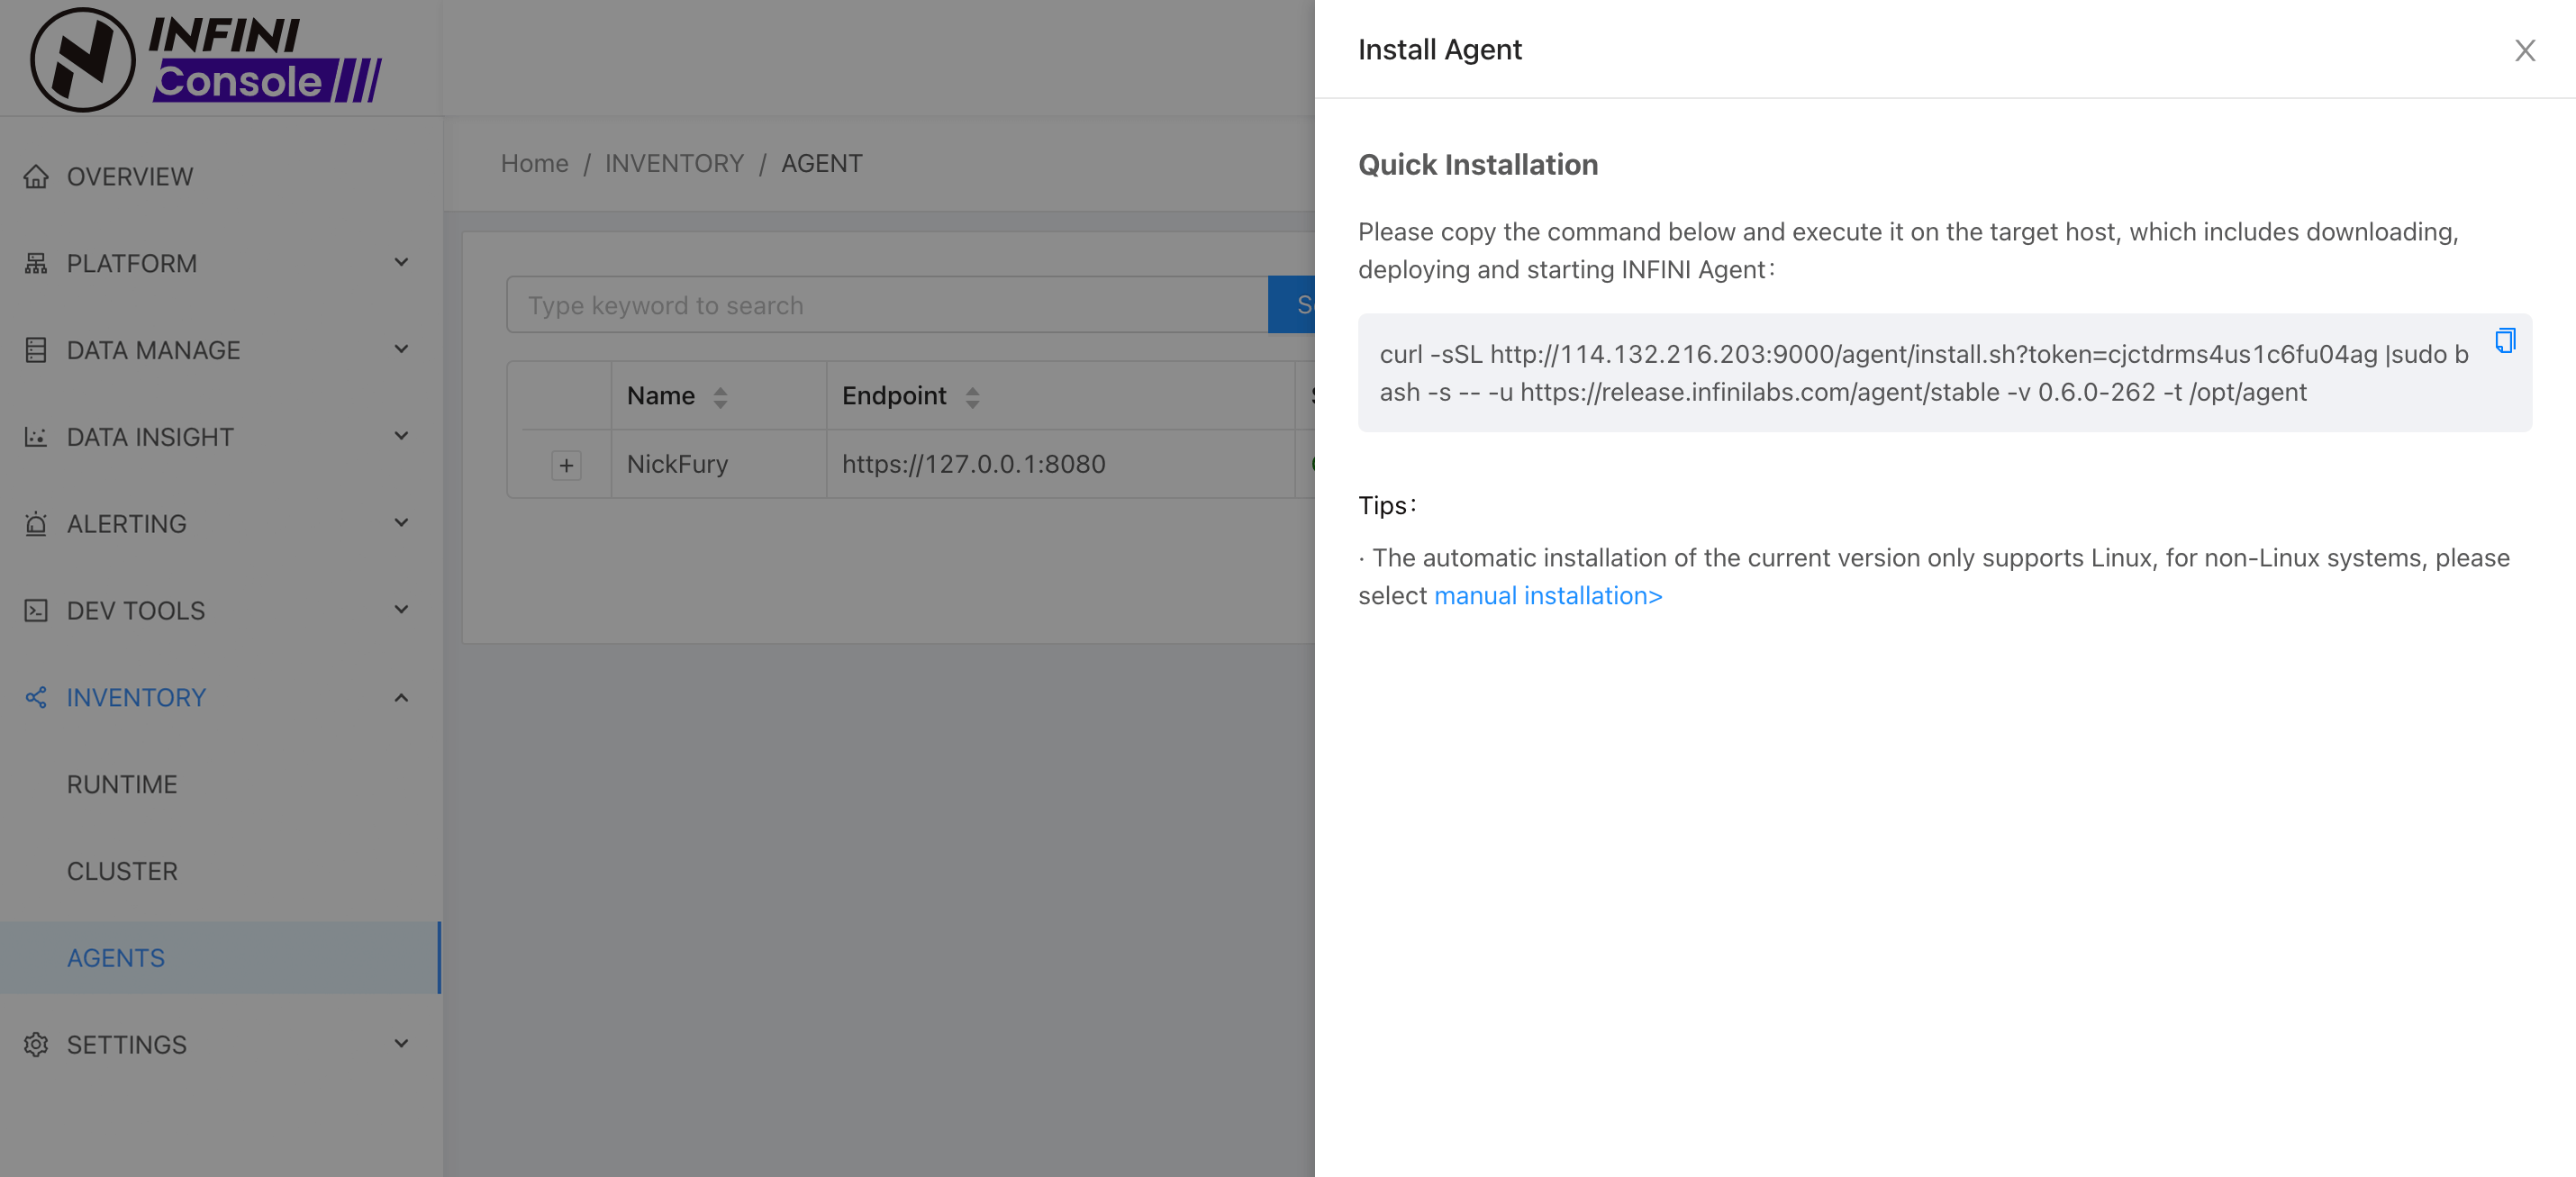
Paste the copied installation script into the target host to perform a one-click quick installation. The generated configuration file looks like the following:
path.configs: config
configs.auto_reload: true
env:
  API_BINDING: 0.0.0.0:8080

path.data: data
path.logs: log

api:
  enabled: true
  tls:
    enabled: true
    cert_file: config/client.crt
    key_file: config/client.key
    ca_file: config/ca.crt
    skip_insecure_verify: false
  network:
    binding: $[[env.API_BINDING]]

badger:
  value_log_max_entries: 1000000
  value_log_file_size: 104857600
  value_threshold: 1024

agent:
  major_ip_pattern: .*
The certificate used here is automatically generated by the Console during installation. Once the installation is successful, the agent instance will be automatically registered to the Console. The Console will then communicate with the agent using mTLS. The token used during installation is for quick installation purposes only and cannot be used for other APIs. The token is valid for one hour.
Make sure that the Console host and the Agent host are network-accessible to each other.
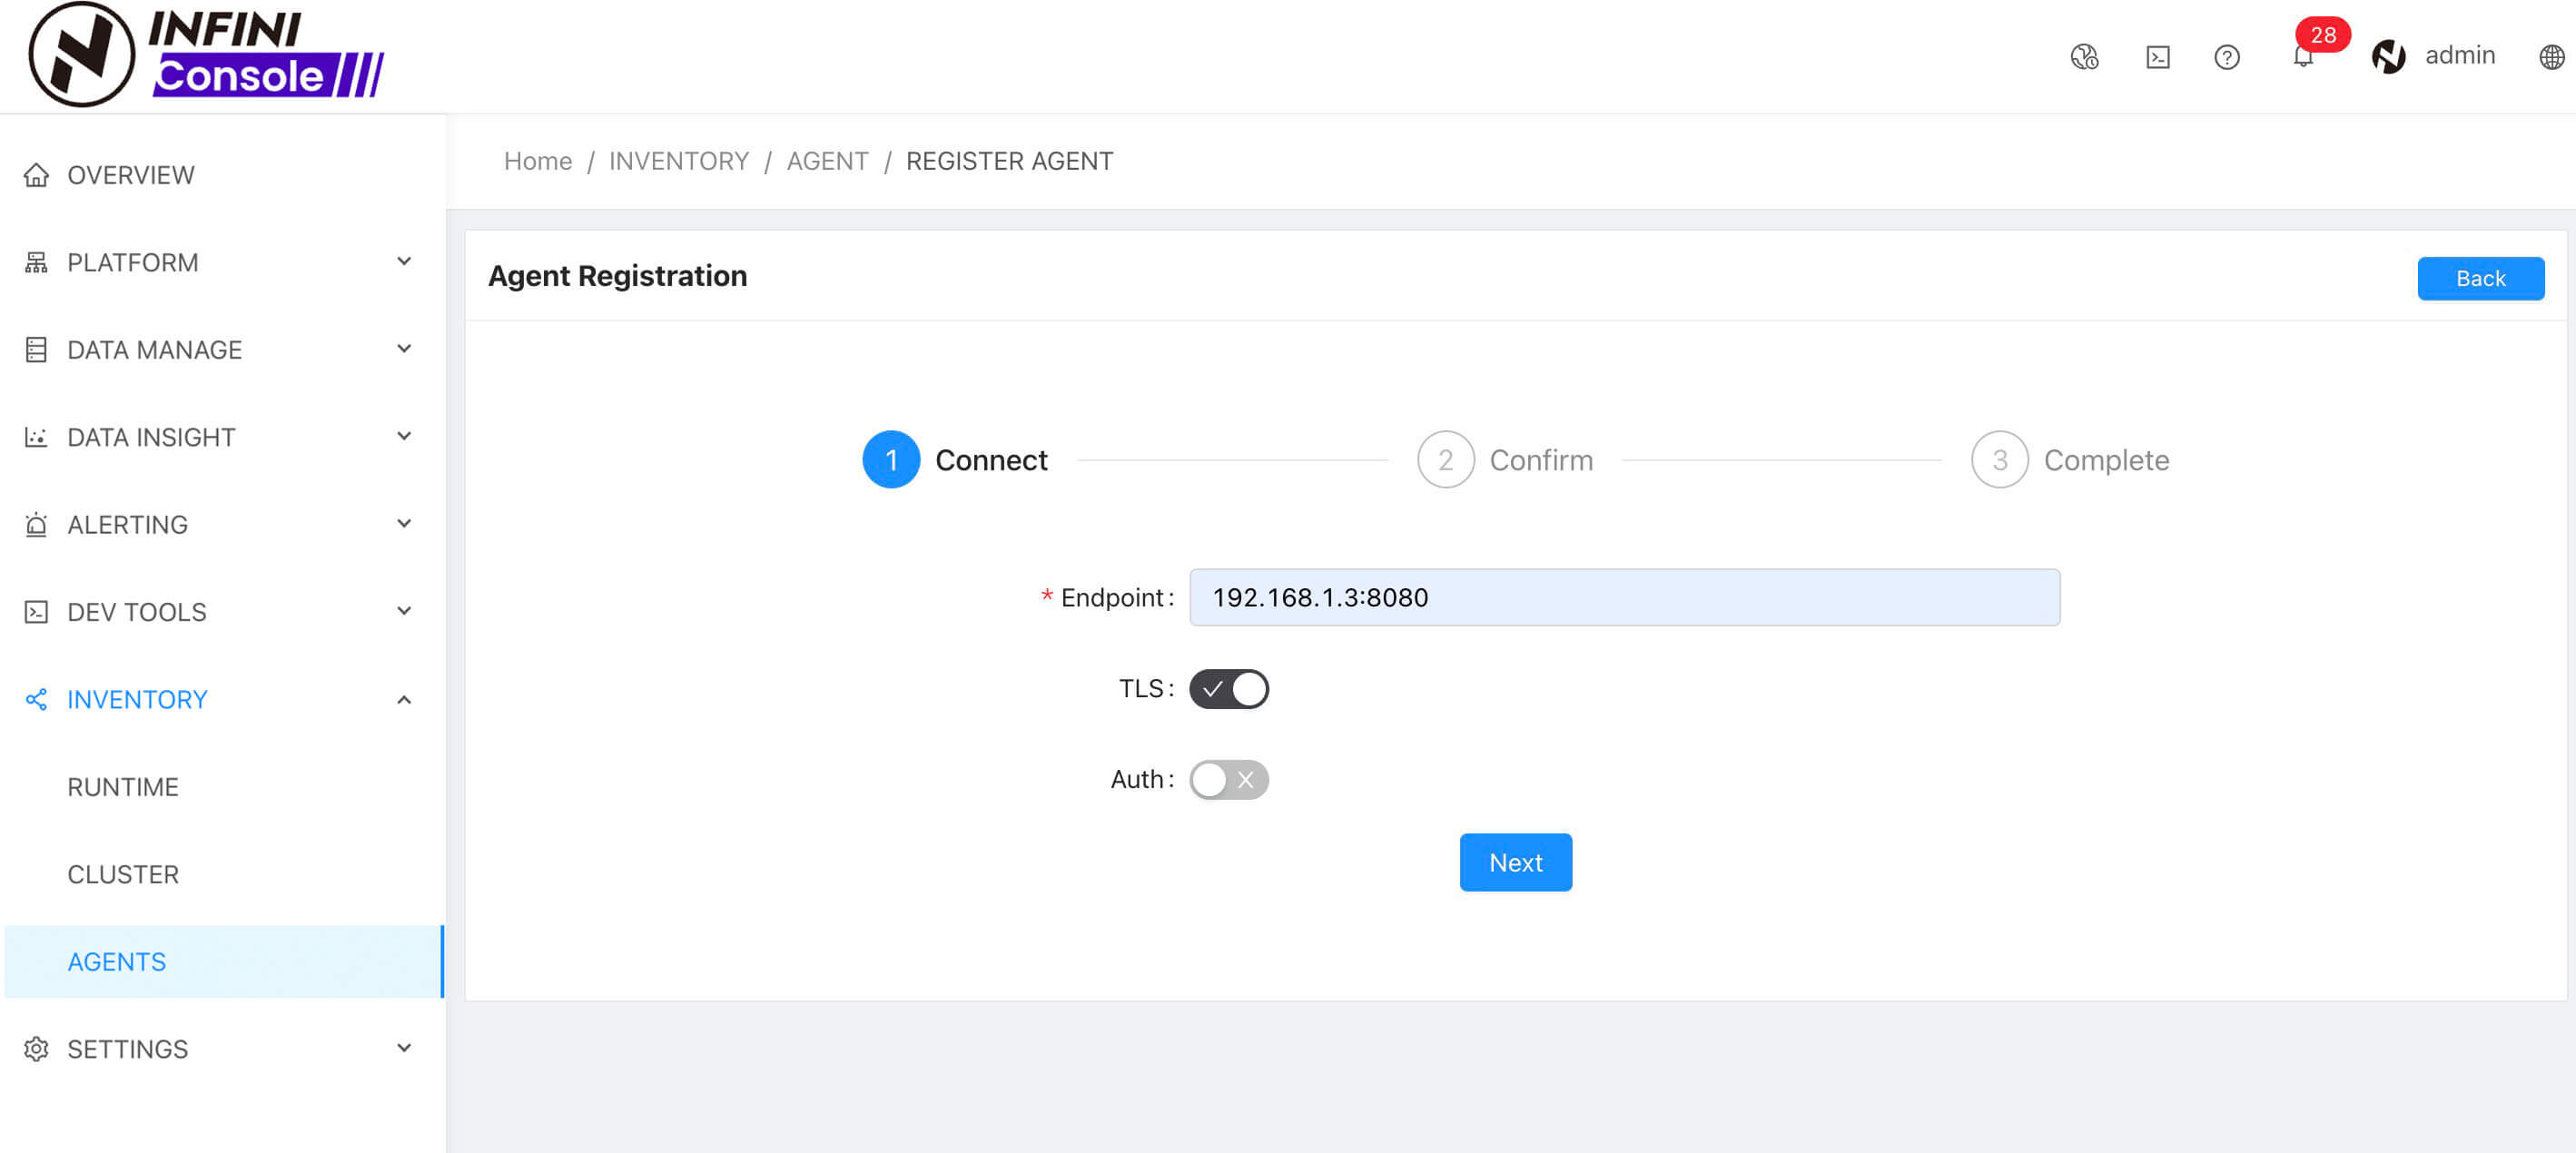
Agent Instance Registration #
Step 1: Enter the agent address, and optionally enable TLS and authentication (if authentication is enabled, a username and password are required).
Step 2: Confirm the information, and optionally modify the agent name, tags, and description.
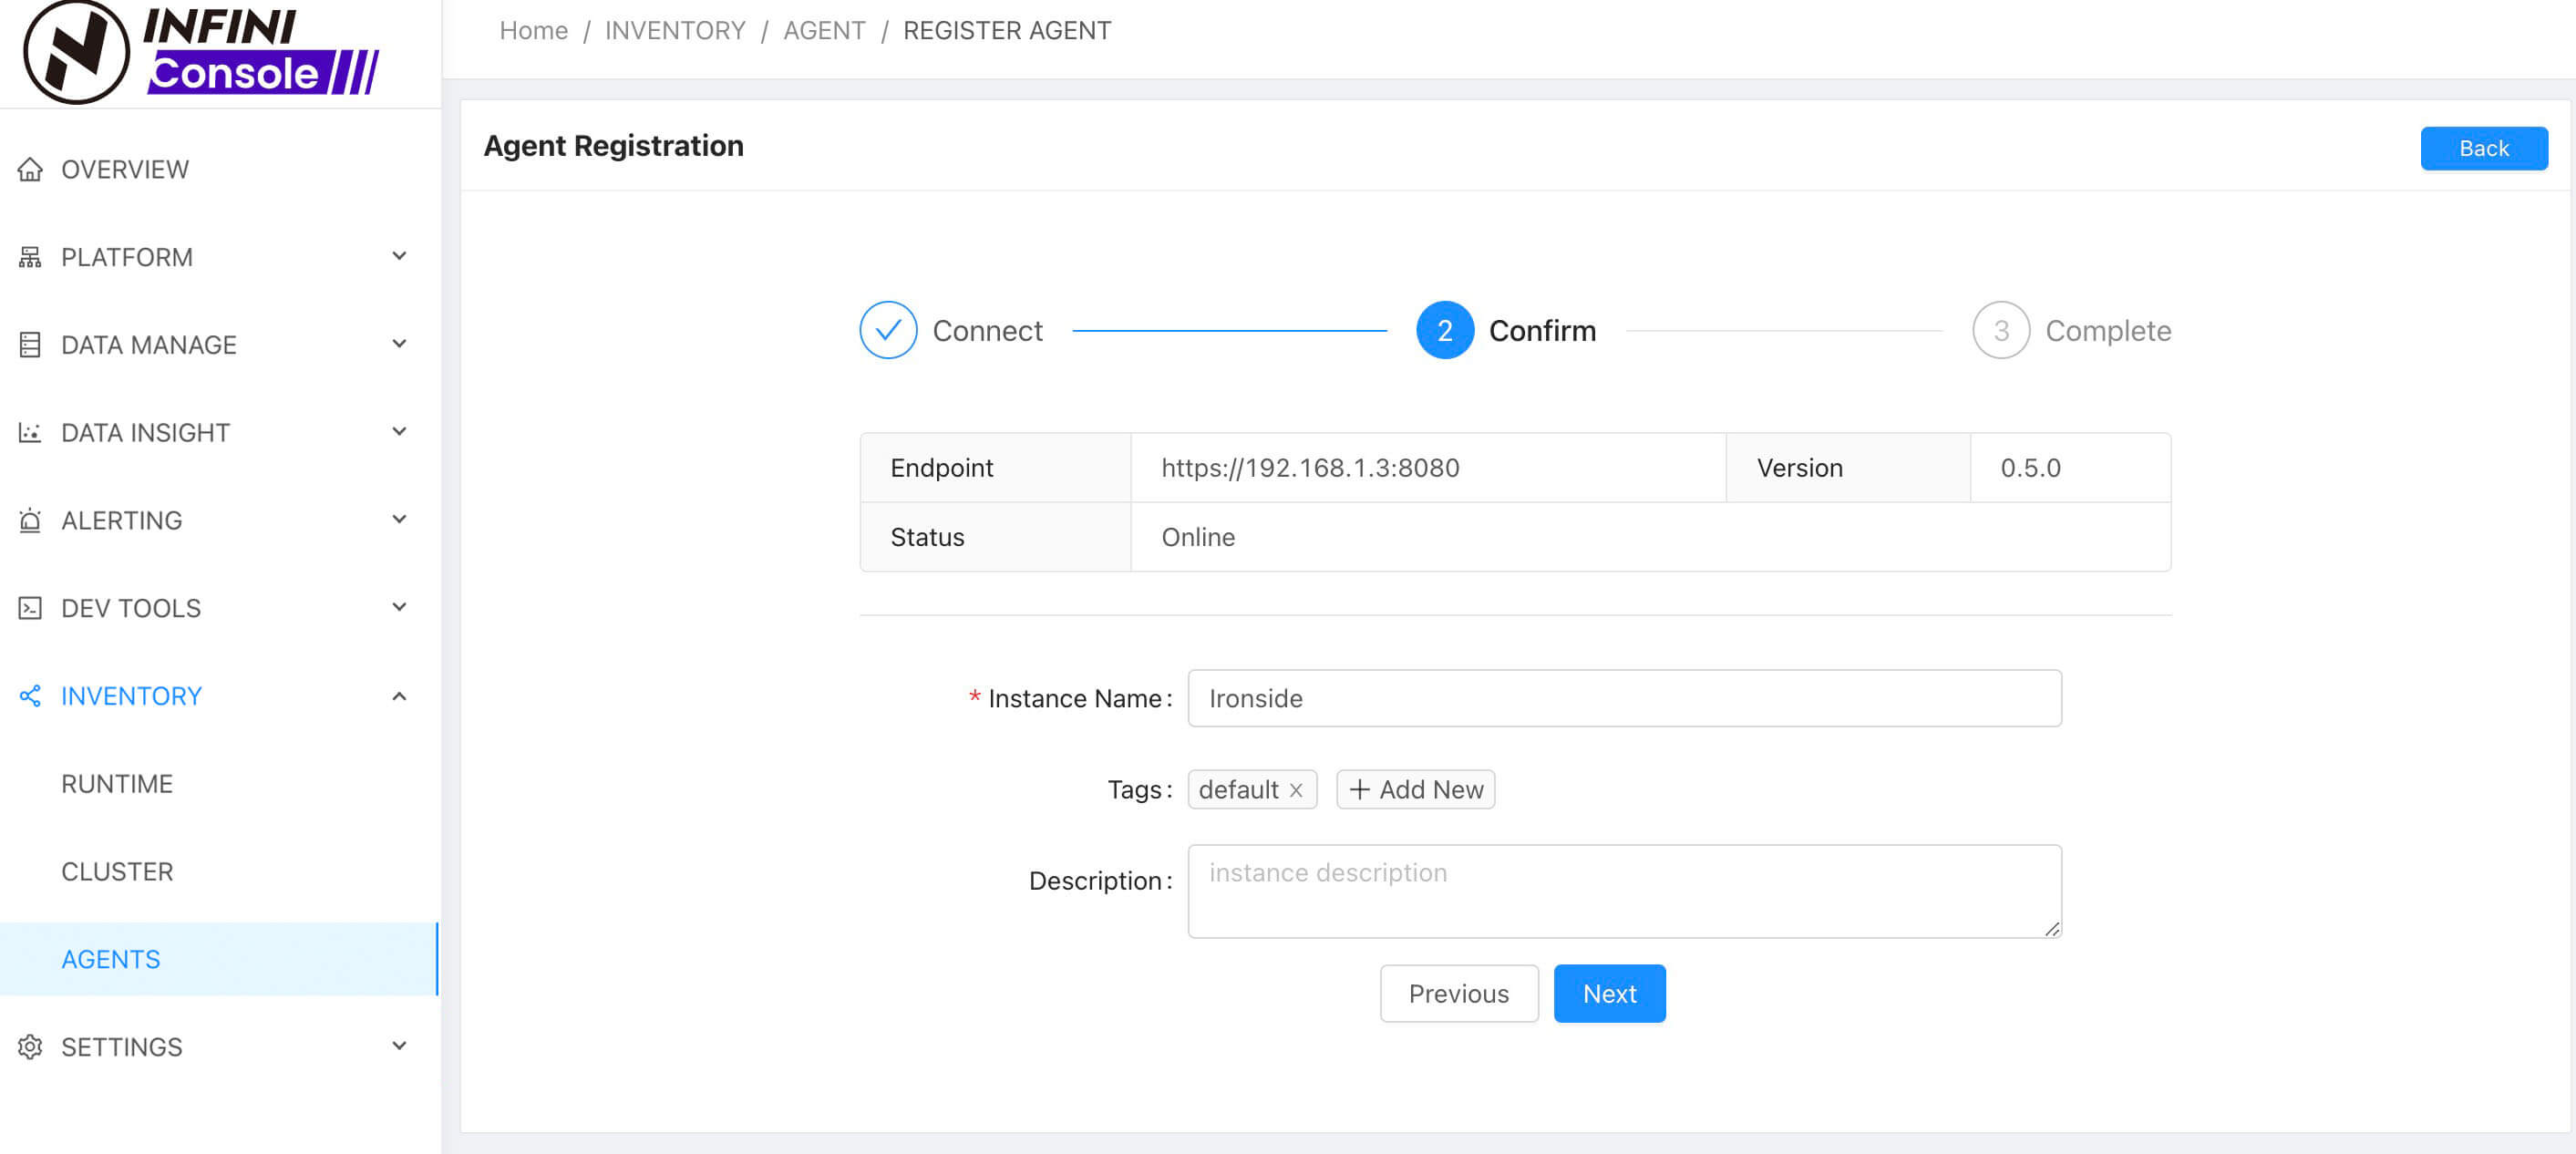
After completing the input, click Next to finish registration.
Agents installed via the one-click installation script from INFINI Console are automatically registered to the Console, no manual registration is needed.
Agent Instance List #
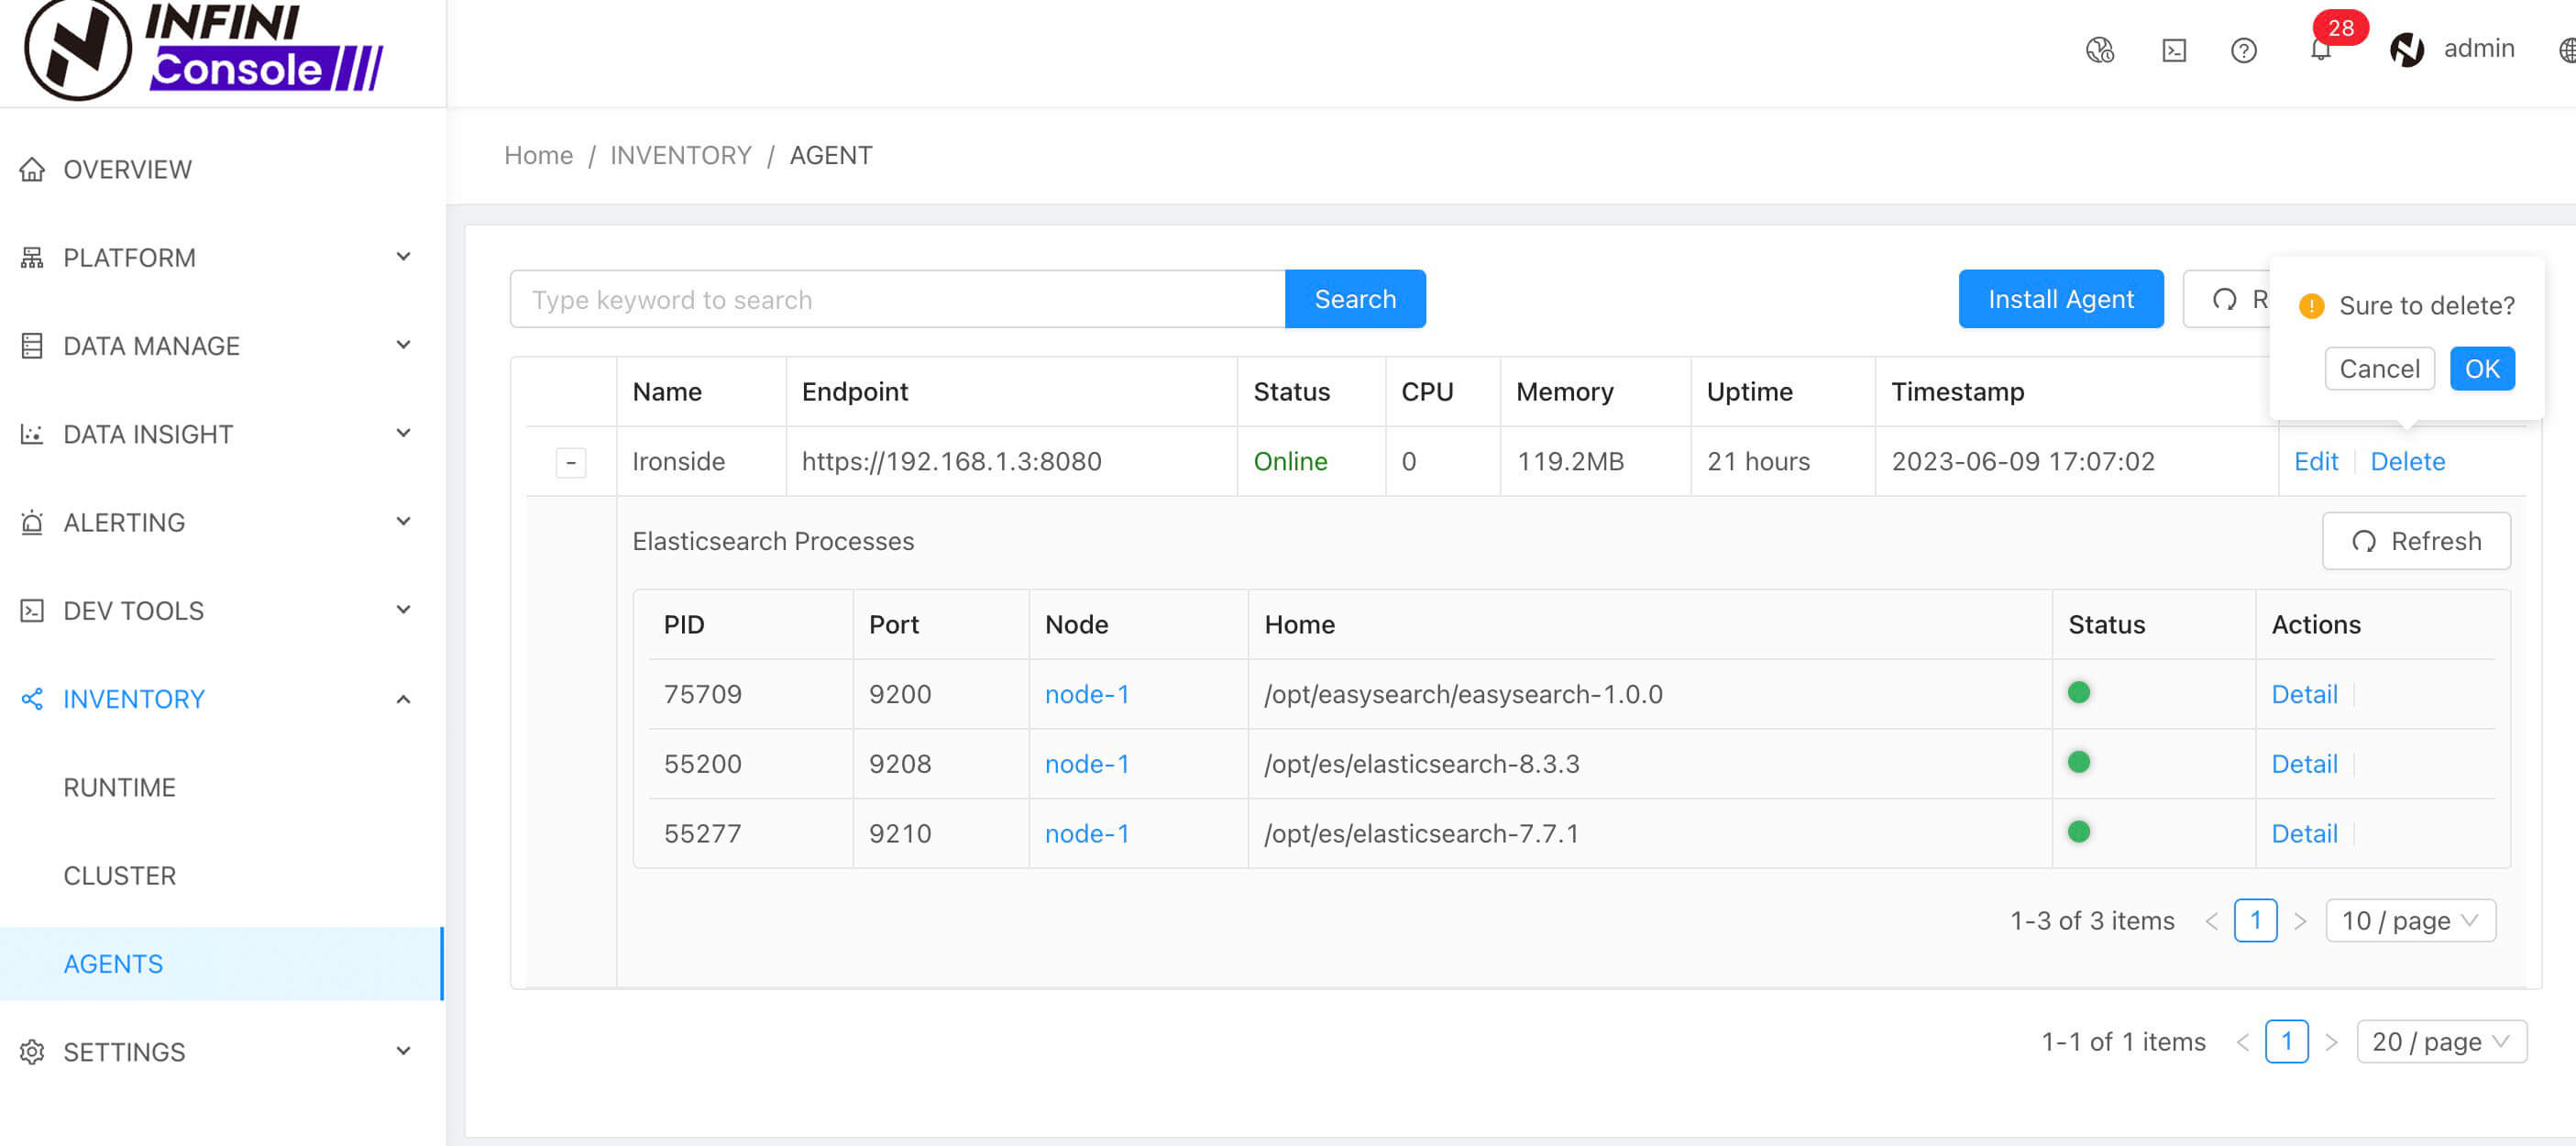
In the agent instance list, you can view registered agent instances as shown below:
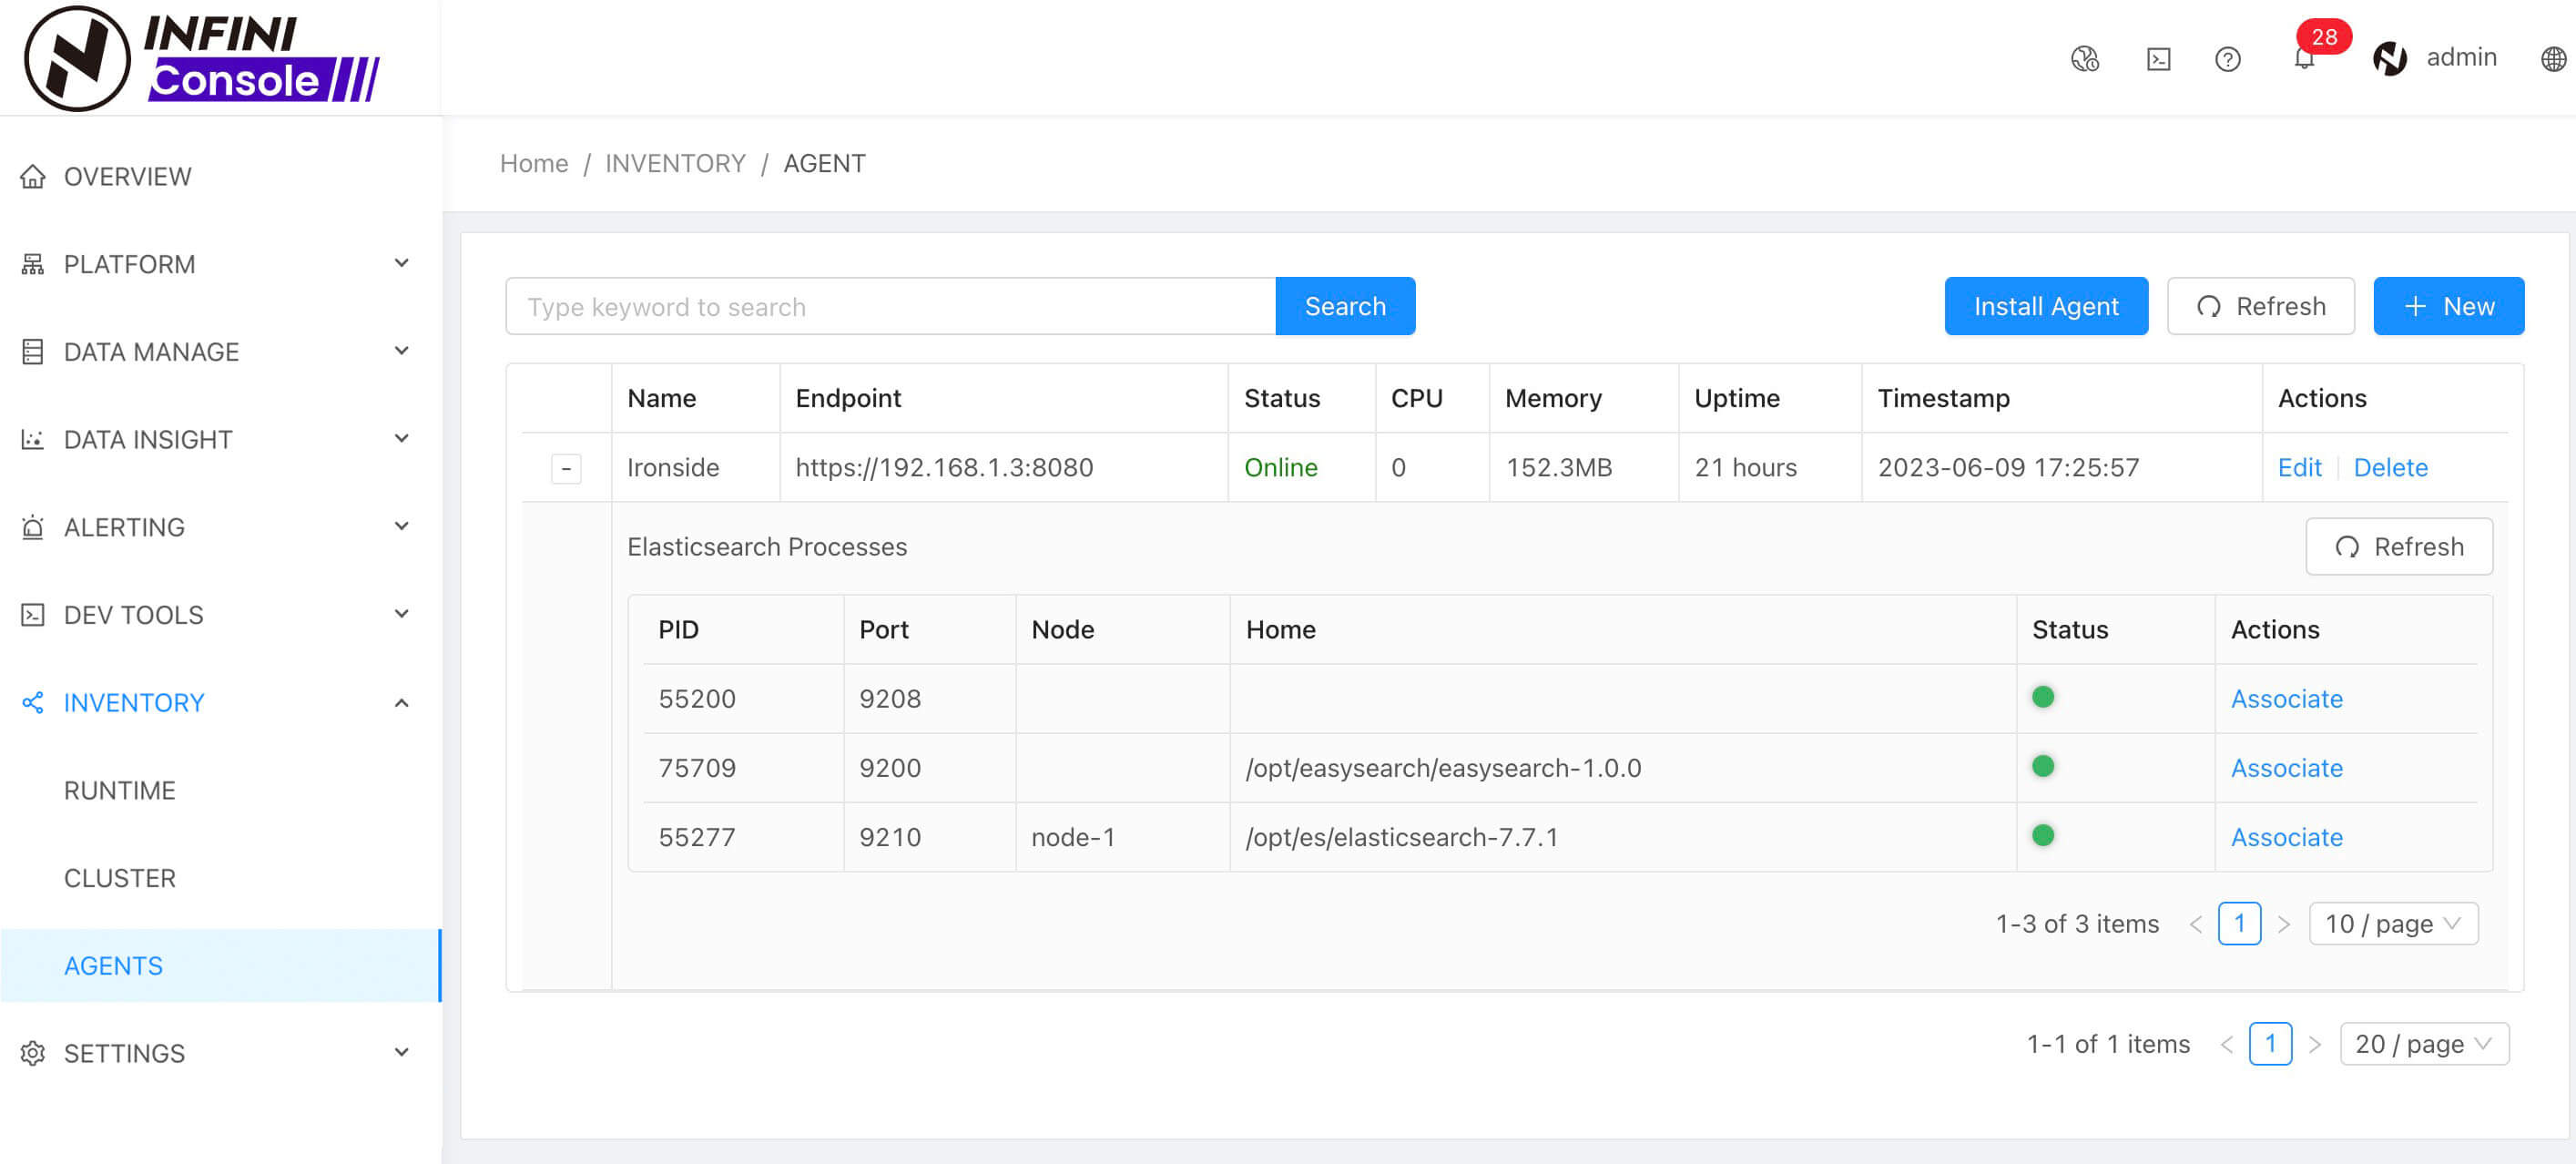
Expanding a table row displays all Elasticsearch, Easysearch, and Opensearch node process instances on the agent. Click the refresh icon in the upper right corner after expanding to refresh the process list.
Associate Node Processes with Registered Clusters in Console #
To collect cluster metrics and node logs via the Agent, associate the automatically discovered Elasticsearch, Easysearch, and Opensearch node processes with already registered clusters in the Console. Once associated, the collected metrics can be directly used in the Console monitoring features. The association process is as follows:
Click Associate in the node process list to open the following dialog:
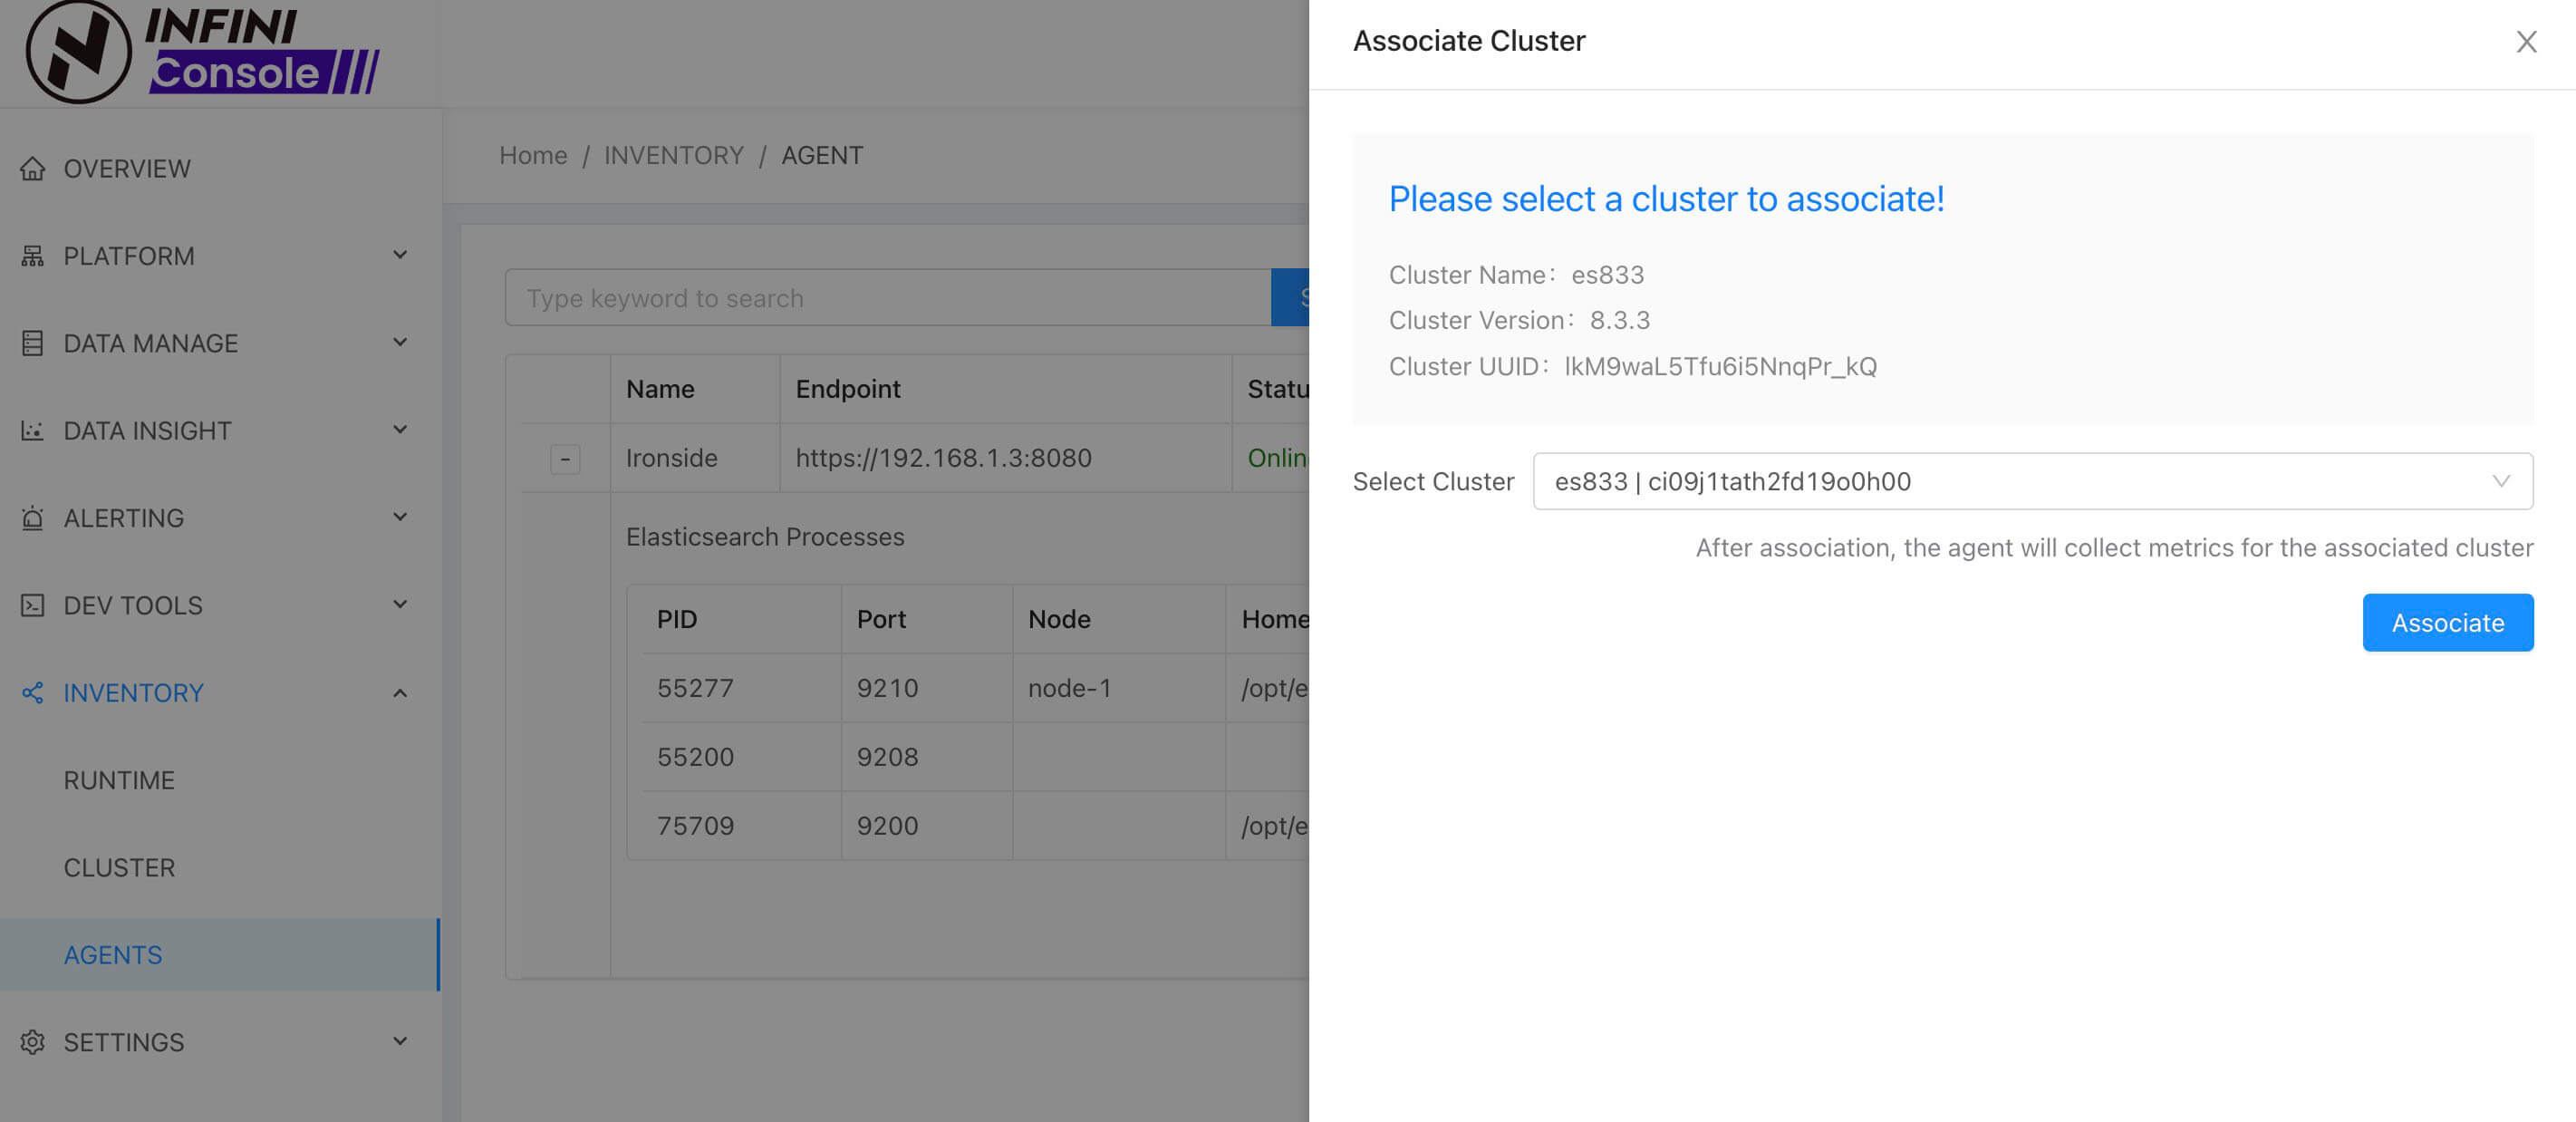
- If the node’s cluster has already been registered in the Console, simply click
Associatein the popup window to complete the operation. Once associated, the Agent will automatically collect cluster metrics and node logs. - If the node process requires authentication information, the association dialog will look like this:
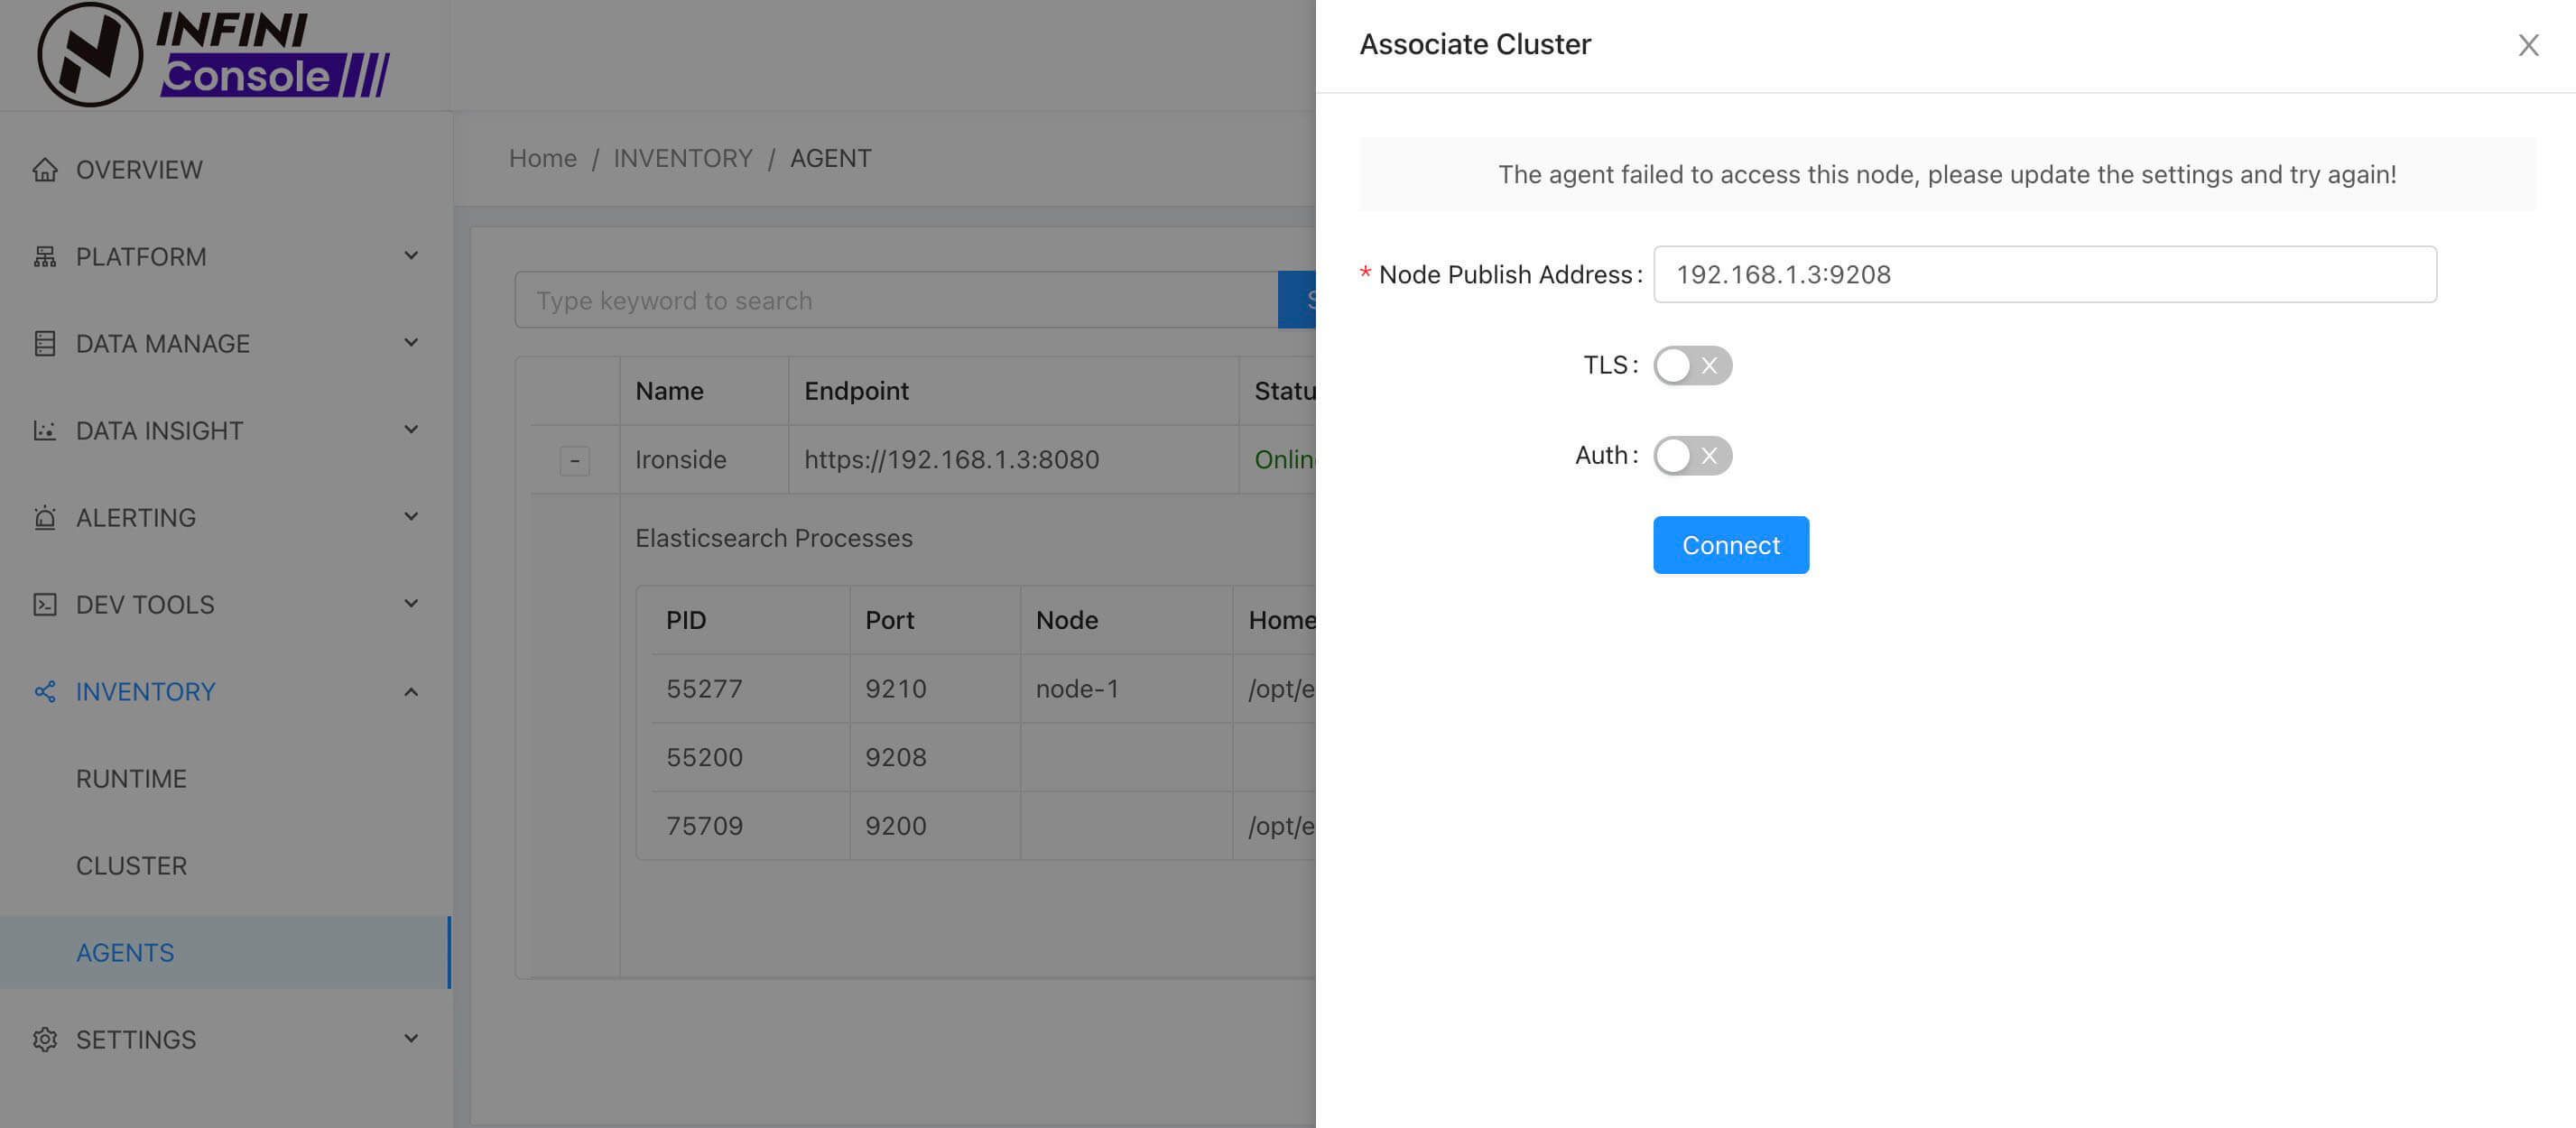
You need to enter the node address and authentication details, then attempt a connection to fetch the cluster info.
- If the cluster has not yet been registered in the Console, the dialog will look like this:
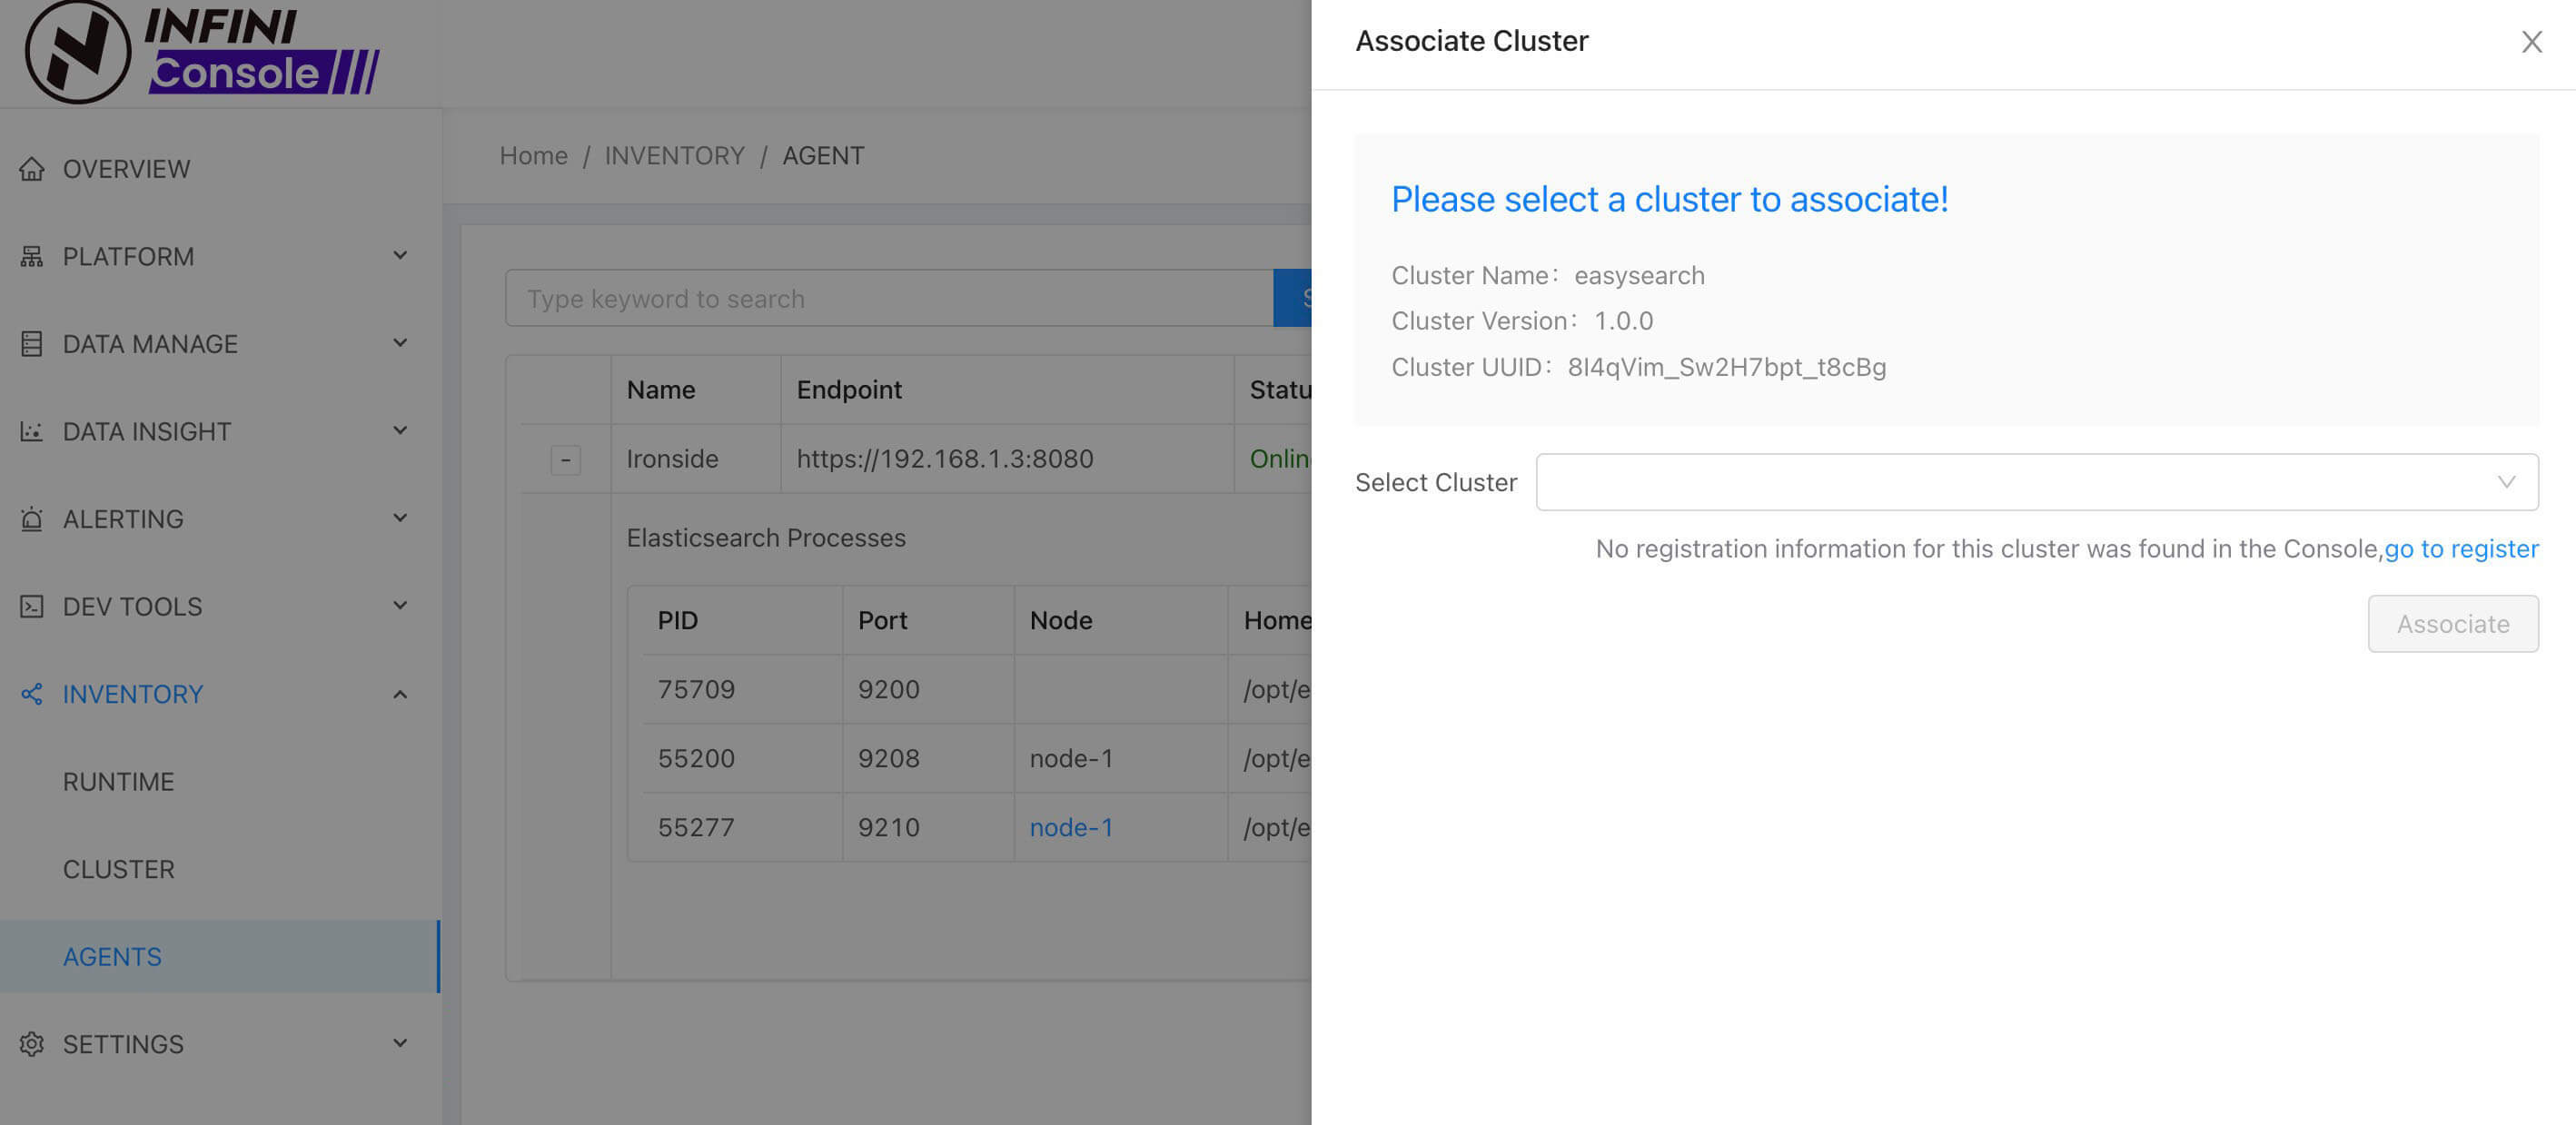
Just follow the instructions and click go to register to register the cluster. Once registered, return to complete the association.
Edit Agent Information #
Click the edit button in the agent list table to enter the update screen.
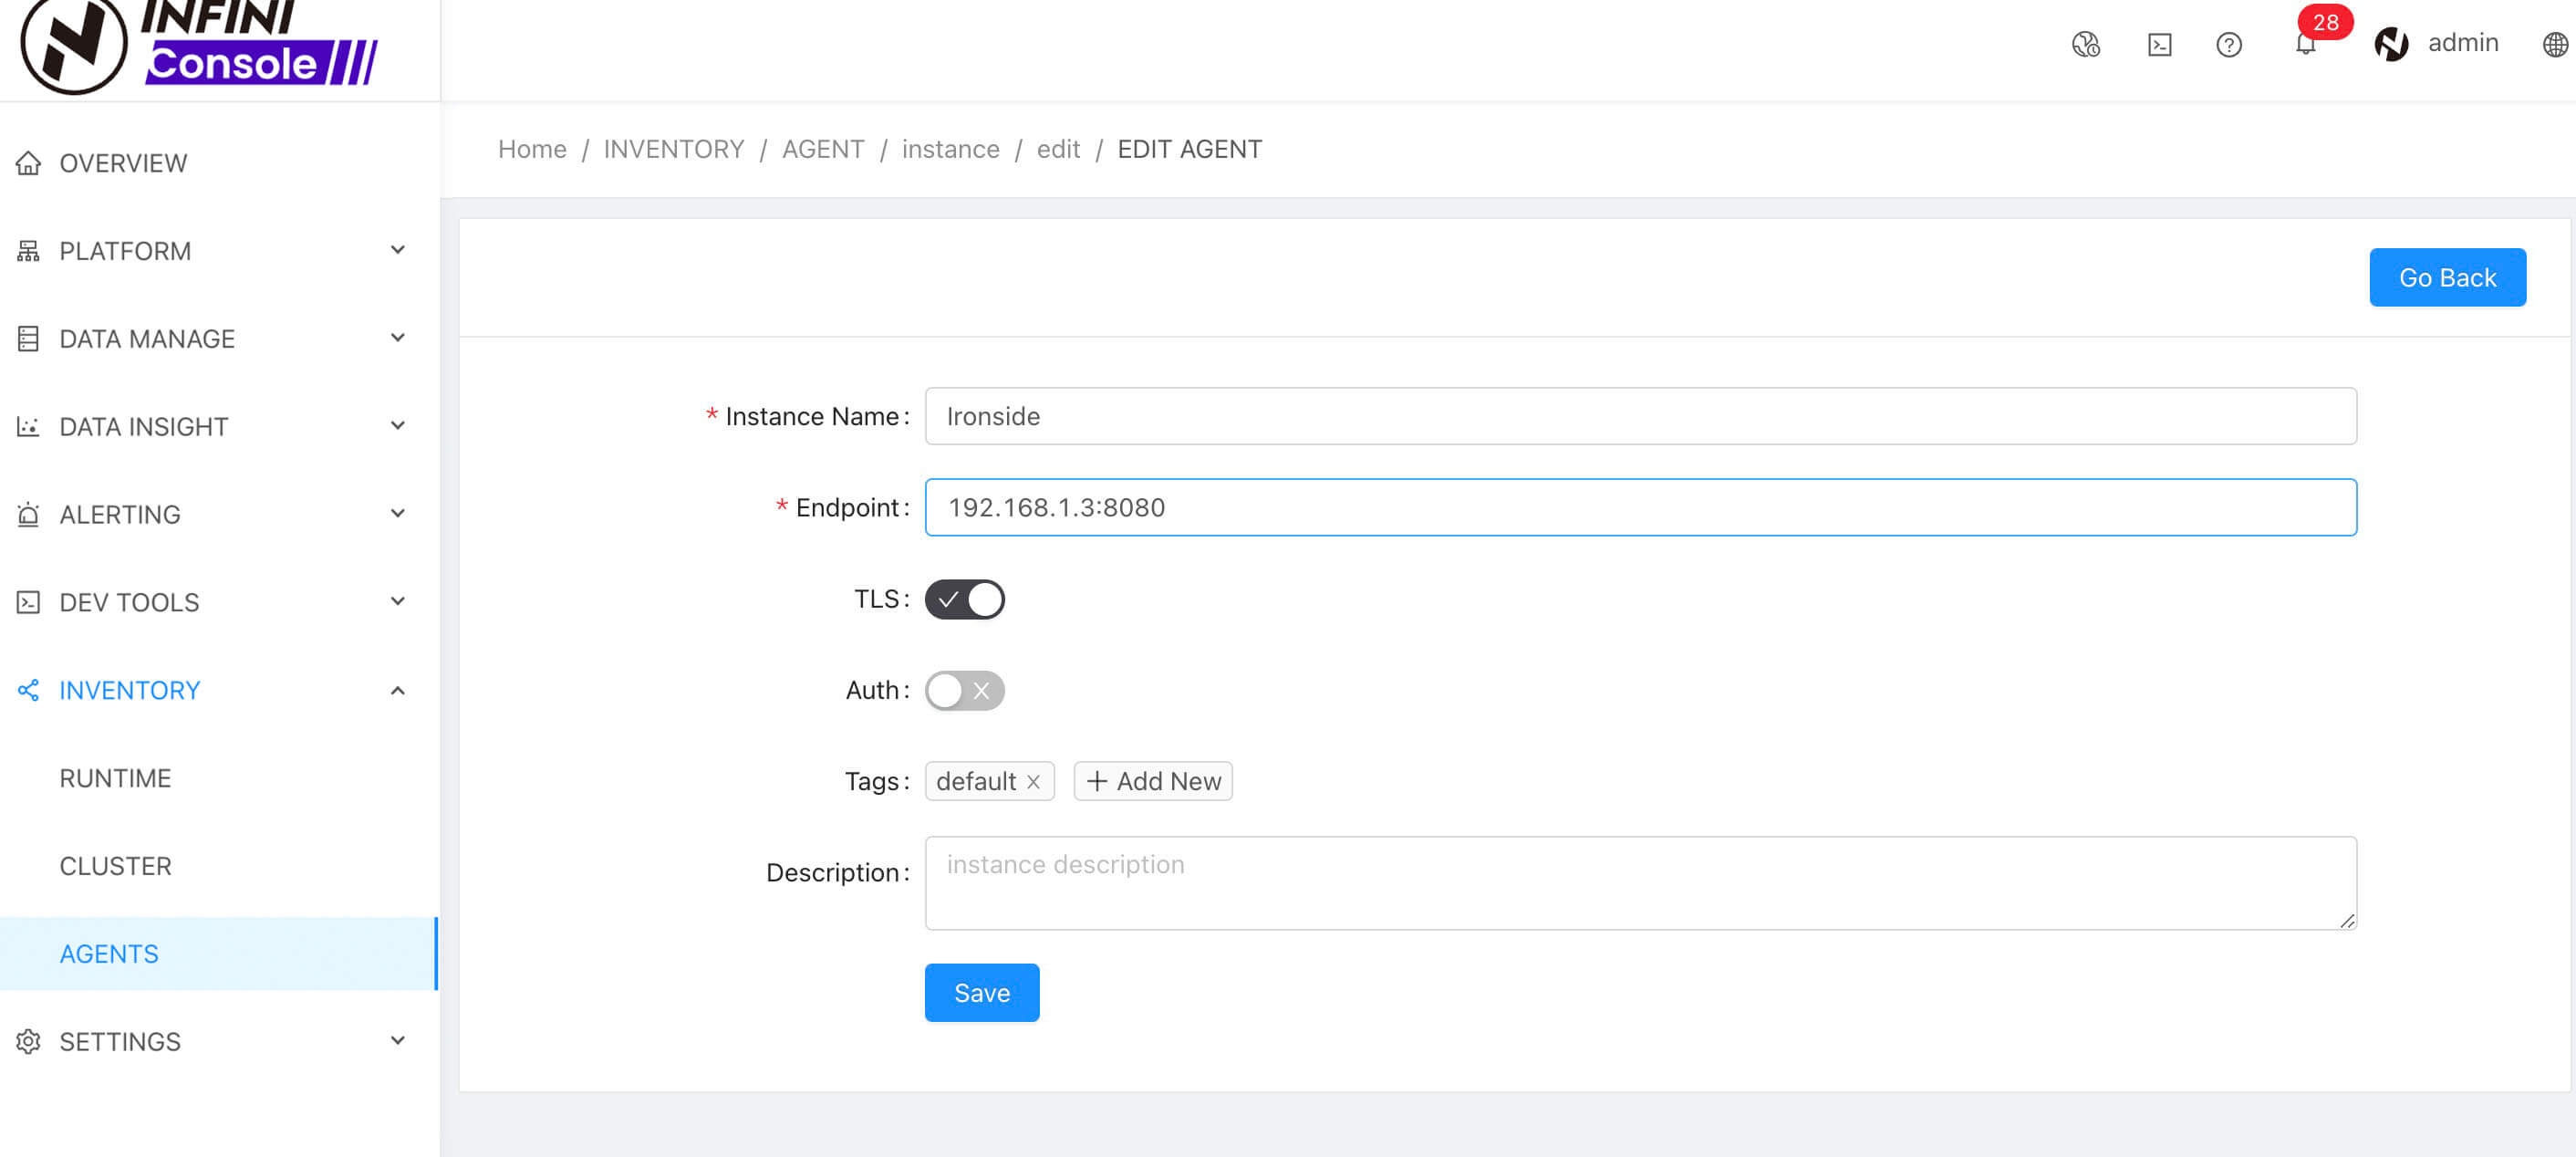
Modify the configuration as needed, then click the save button to submit.
Delete Agent Instance #
Go to the menu INVENTORY > AGENTS , then click Delete in the corresponding row. After confirmation, the agent will be deleted.