How to easily create an Elasticsearch “guest” user #
Introduction #
In some cases, we want to share some functions or data with customers, but do not want the data to be modified. At this point we need to create a “guest” user. This article briefly describes how to create a “guest” user using the INFINI Console.
Prepare #
- Download and install the latest version of INFINI Console
- Enable INFINI Console Security Features
Creating a Role #
Click System > Security Settings on the left menu of INFINI Console, and select the Role Tab page to enter the role management page.
New platform role readonly
#
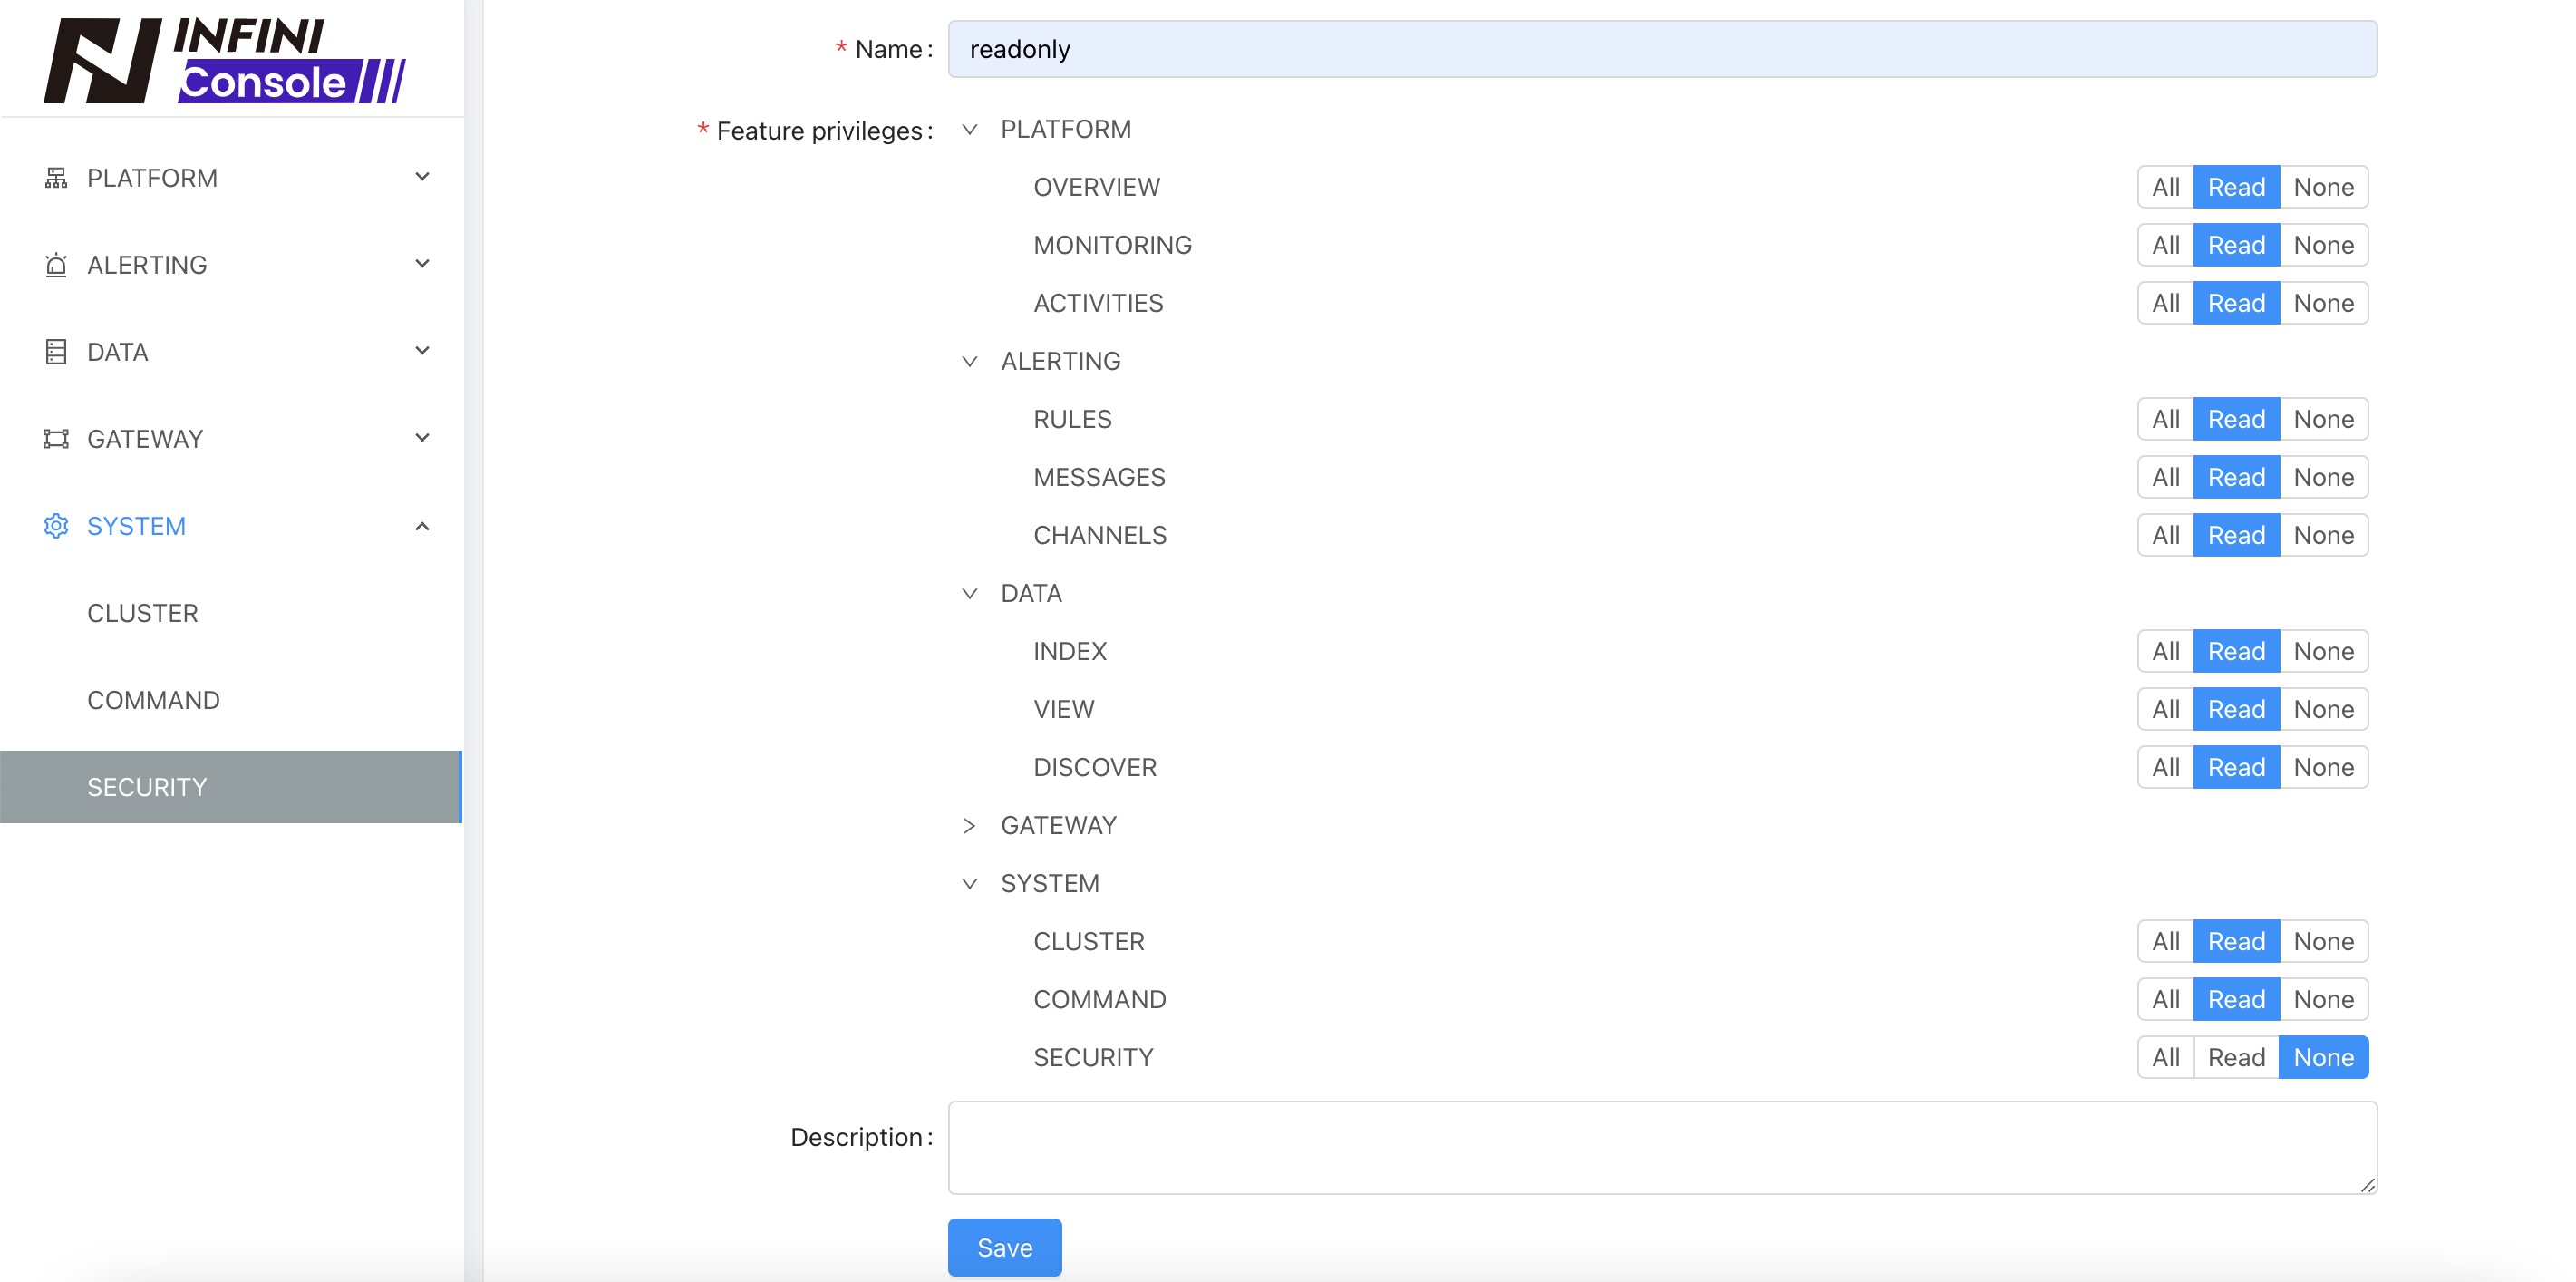
Click the New button, select the platform role, and create a new platform role readonly. The operation steps are as follows:
- Input role name
readonly - Expand all functional permissions
Readpermission is selected for all other functions except the security functions under the system settings.- Security feature under System Settings is set to
Nonepermission. - Click the save button to submit
Selecting the
Allpermission of a function represents the read and write operation permission of this function,Readmeans only have read permission,Nonemeans no permission for this function (the function is not available in the menu after the user logs in)

New data role es-v7171
#
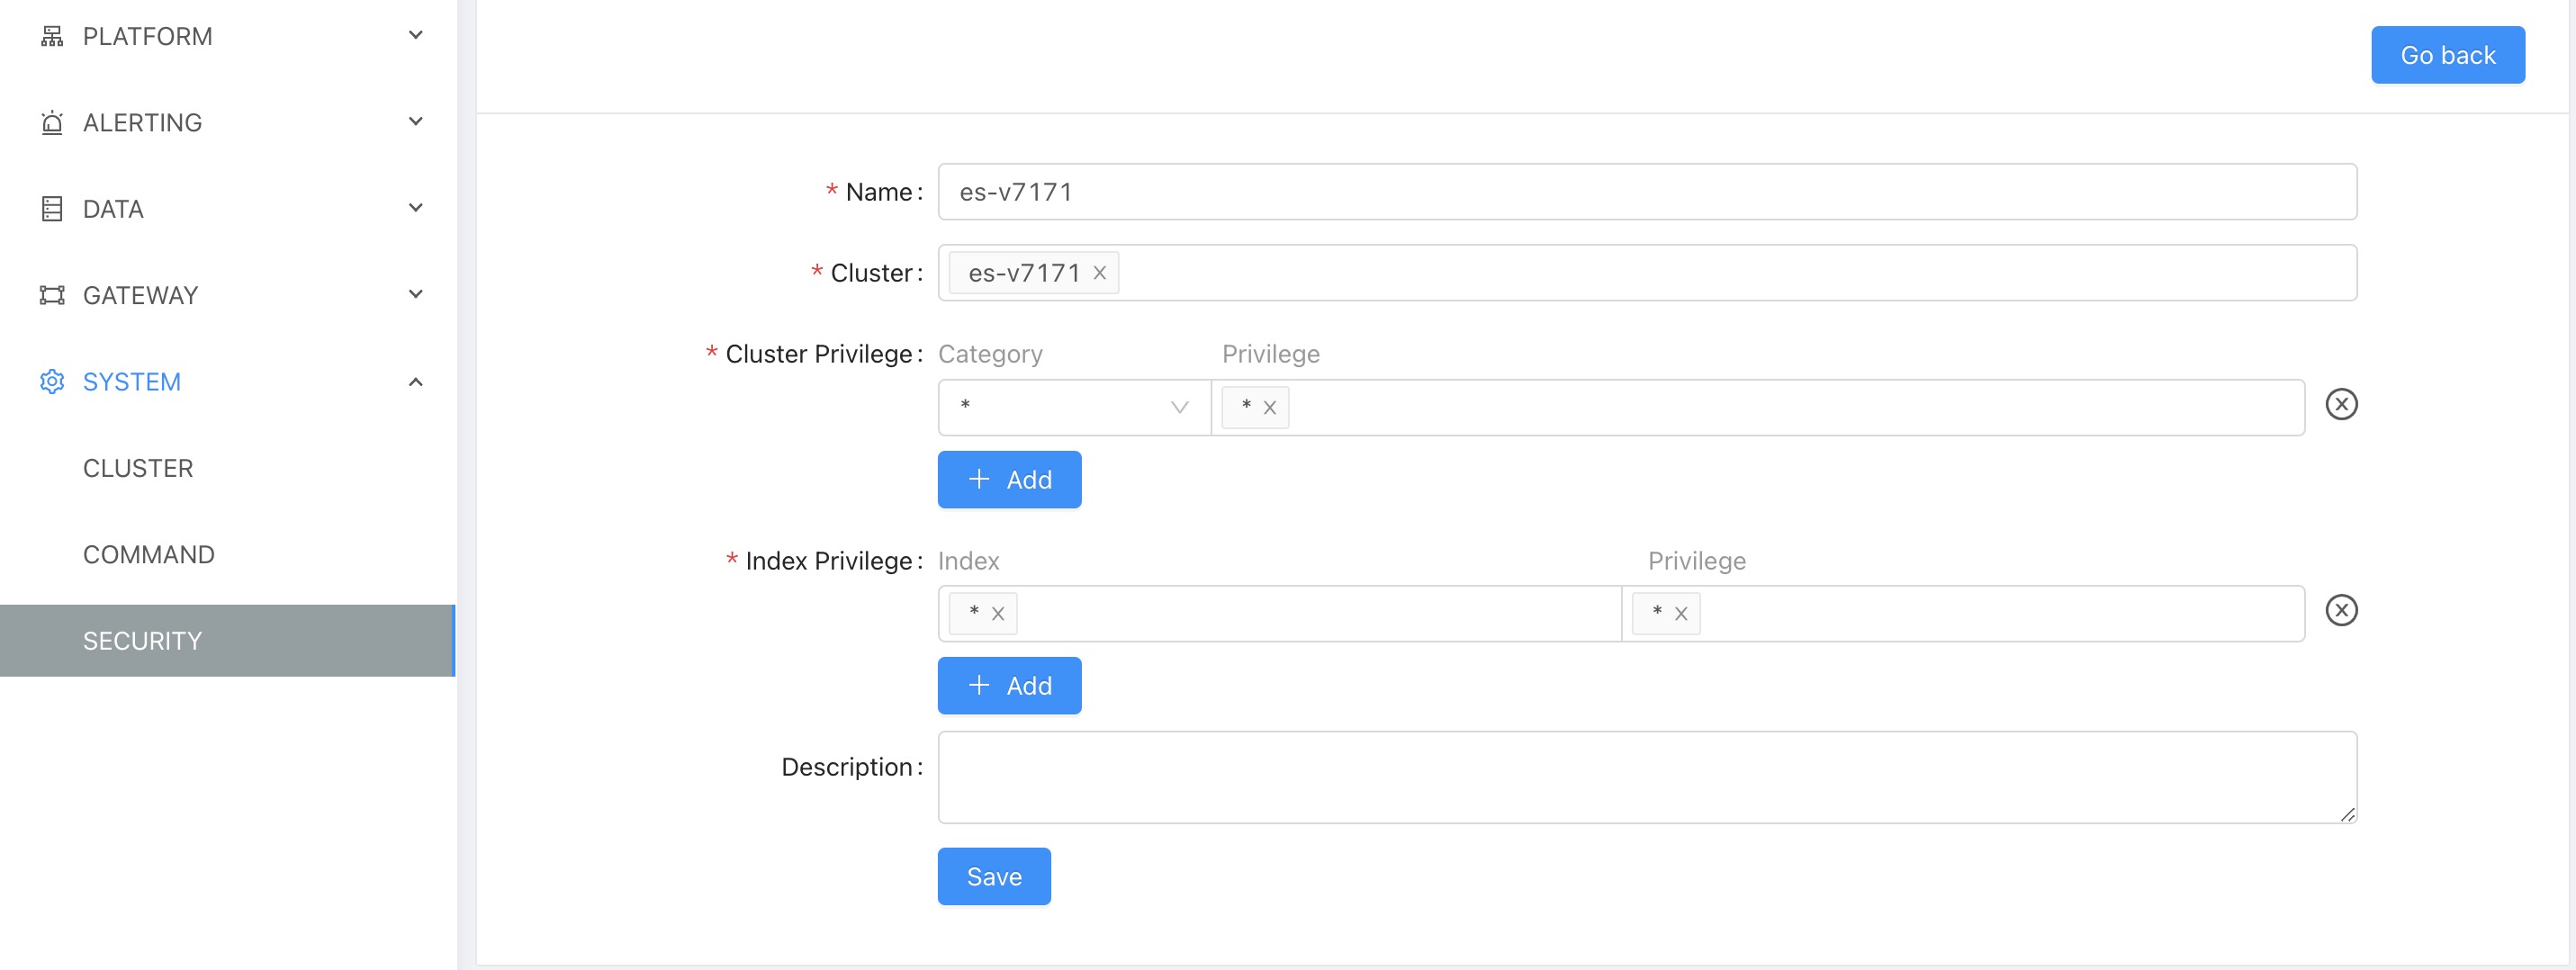
Click the New button, select the data role, and create a new data role es-v7171. The operation steps are as follows:
- Input role name
es-v7171 - Cluster permission select cluster
es-v7171 - Click the save button to submit

New account guest
#
Click the left menu of INFINI Console System > Security Settings, select the User Tab page to enter the Account Management page.
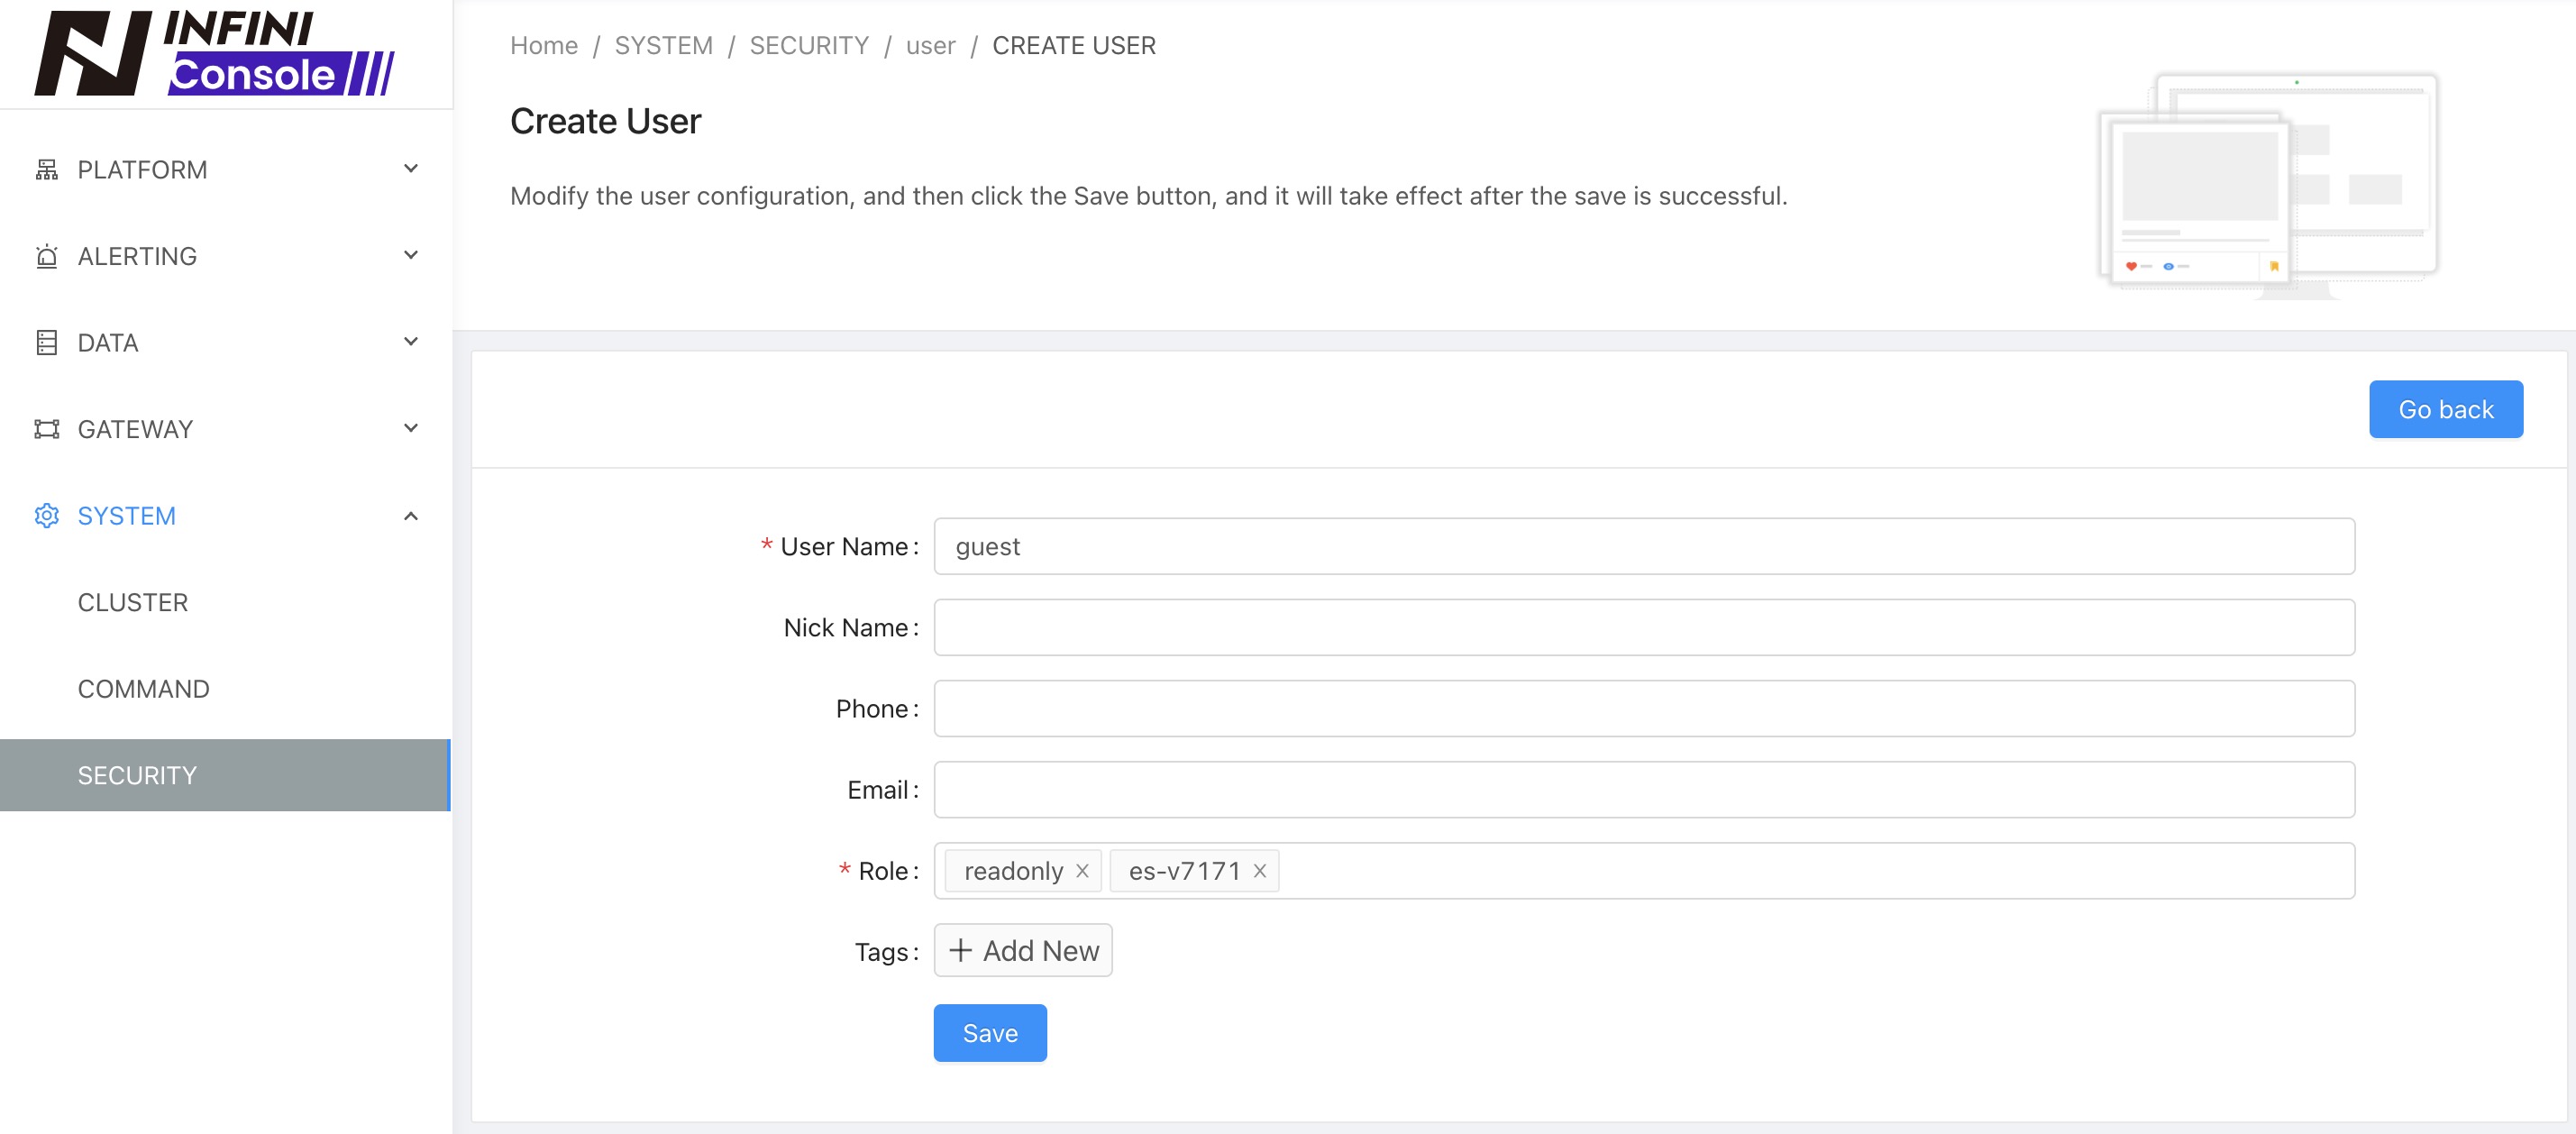
Click the New button to create a new account guest and assign the account role readonly, es-v7171

Click Save and submit. After the creation is successful, you can use the guest account to log in to the INFINI Console and only have read-only permissions.